Connect a Database Tool
If you prefer to use a different database tool other than AdminNeo, here’s how you can connect your tool of choice to any site in Local.
As an example, we’ll use MySQL Workbench, but there are many other tools you can use, such as DBeaver, TablePlus, and Navicat.
Windows
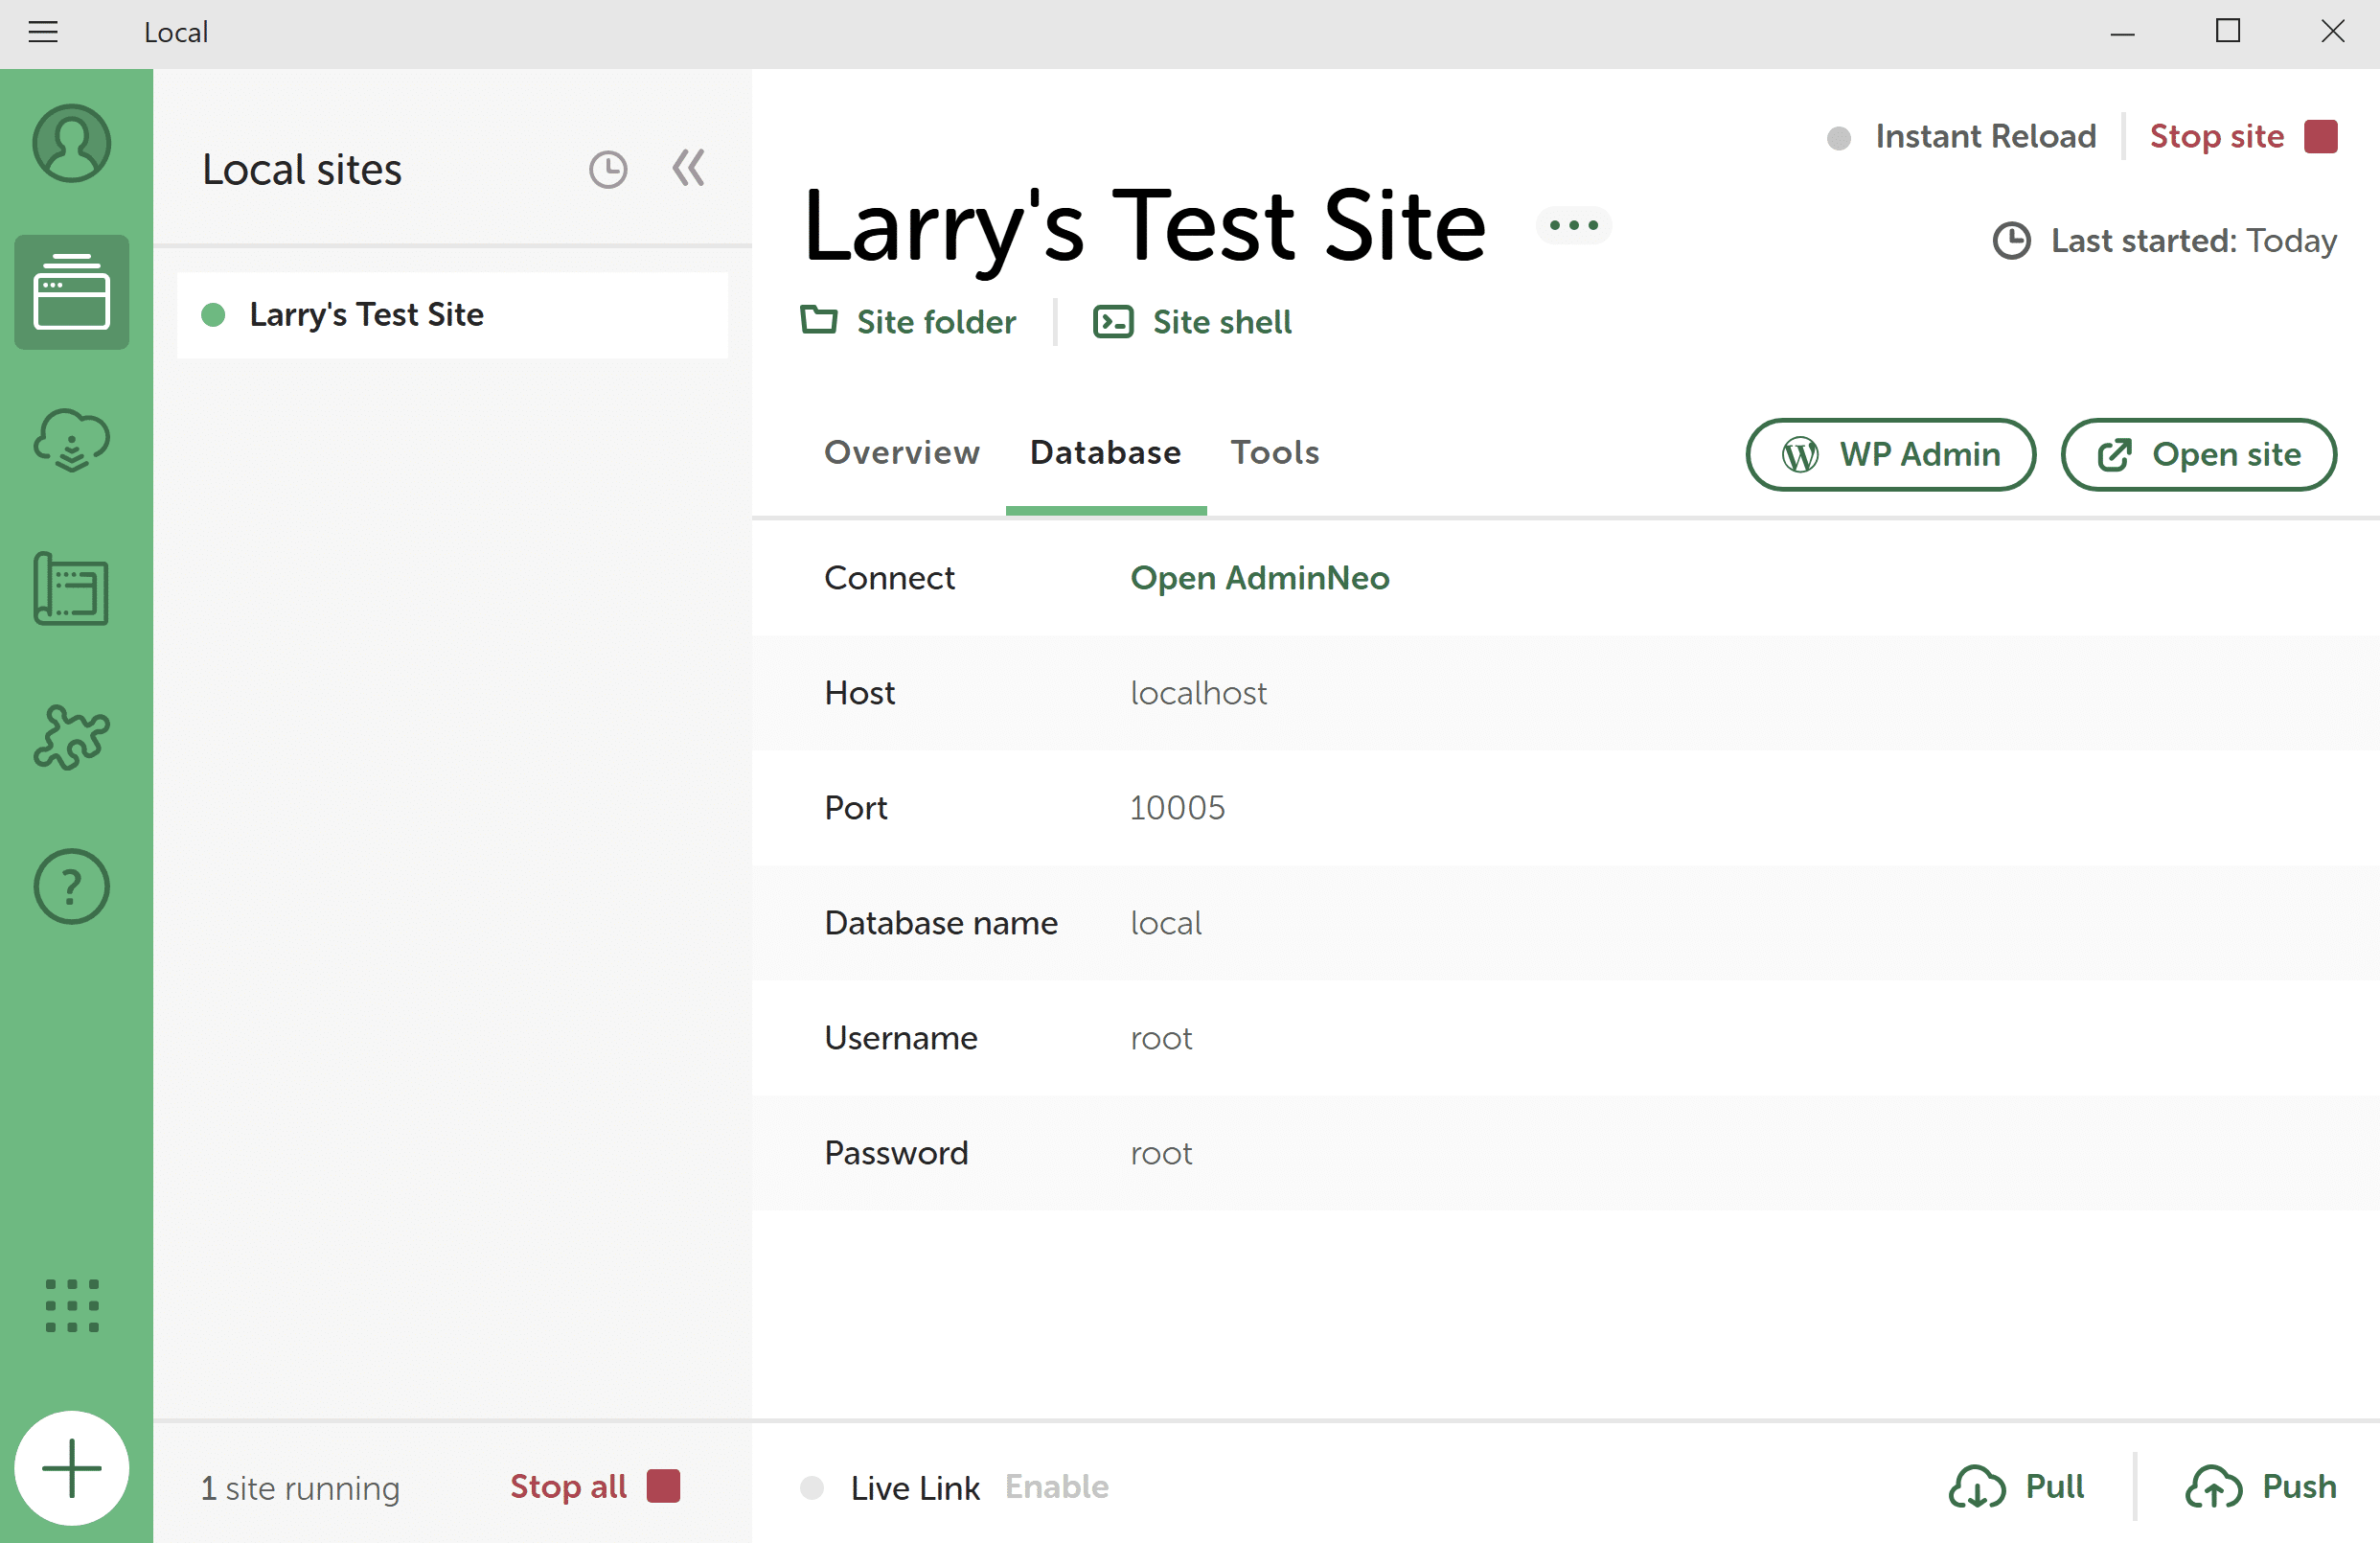
Step 1: Go to the site’s “Database” tab in Local
Step 2: Create a new connection in your MySQL tool
- Use
localhostas the Hostname - Use the
Portin the site’s Database tab as the Port - Use the
UsernameandPasswordfrom the Database tab
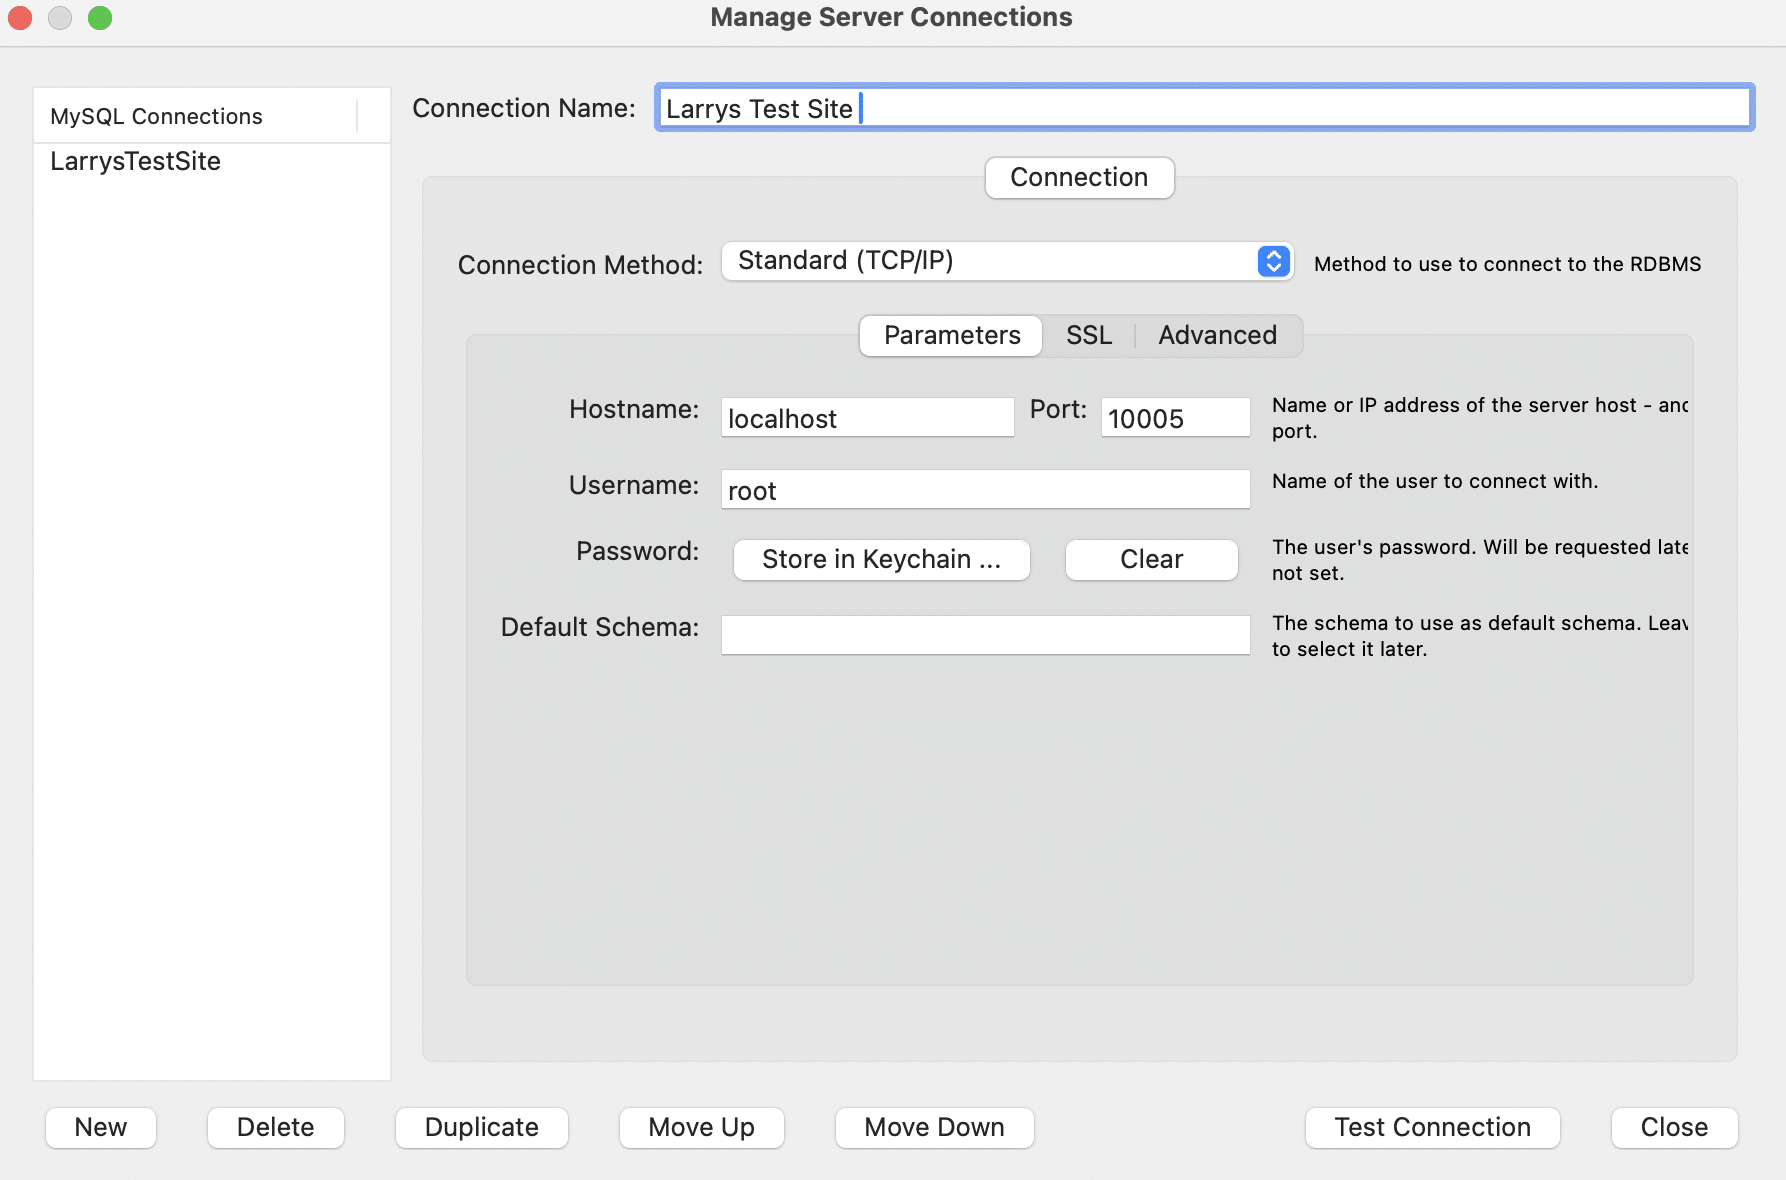
Step 3: Test and save the Connection
MacOS and Linux
Socket Connection
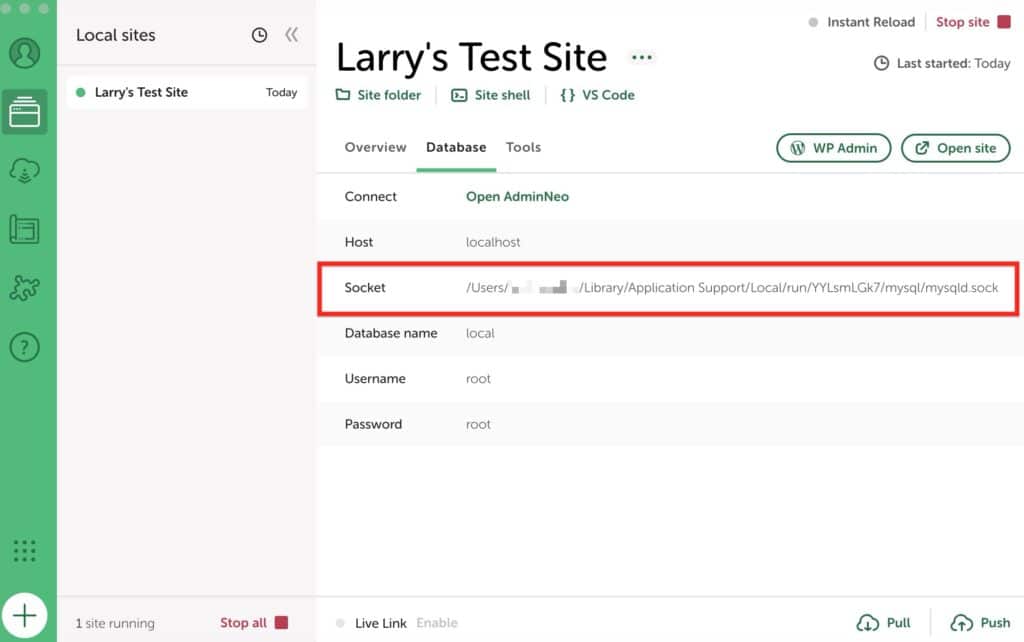
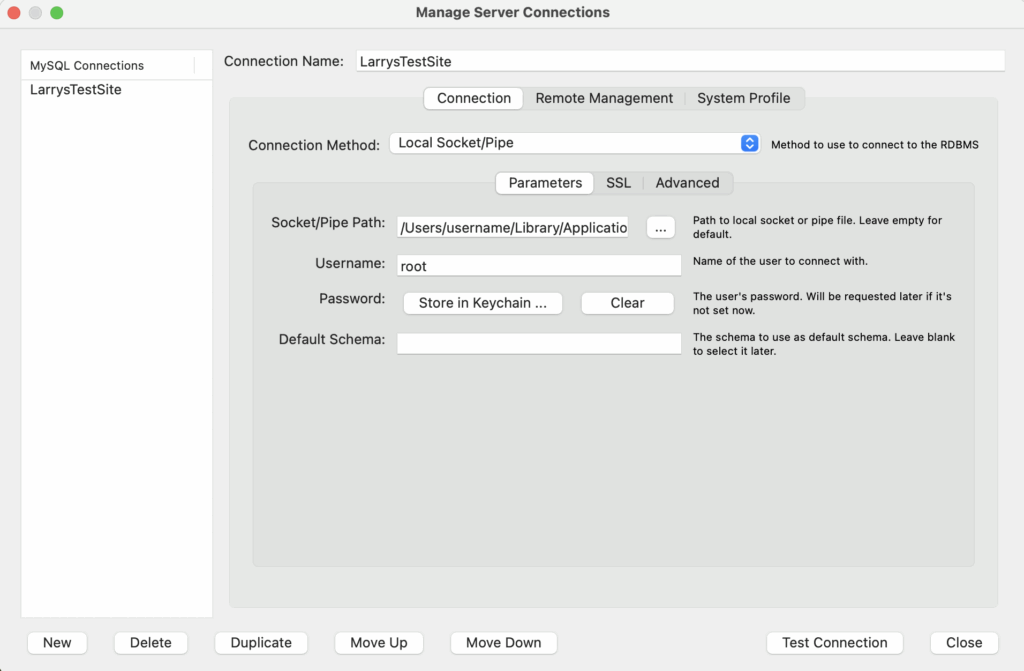
MacOS and Linux utilize a socket connection by default. If you navigate to the Database tab in Local you should see the socket information that can be pasted into your Database tool. Here are screenshots of the Local Database tab and a Socket Connection setup within MySQL Workbench.
TCP/IP Connection
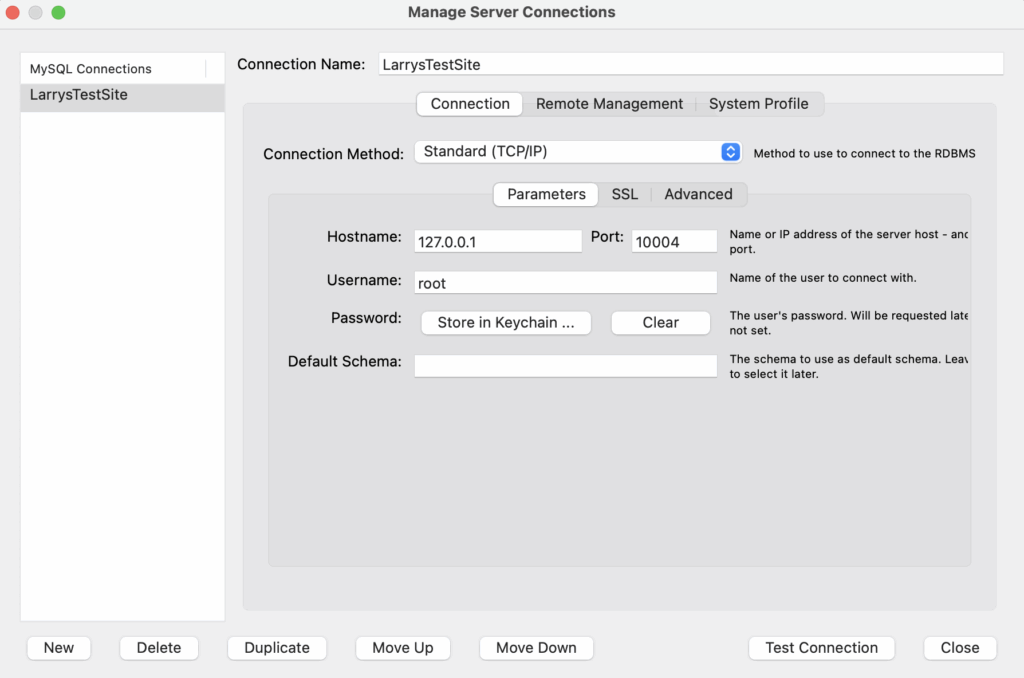
Depending on your MySQL client or application, you may need to connect using TCP/IP instead of Unix sockets. To do so, you can create a new MySQL user bound to the IPv4 loopback address (127.0.0.1) and grant it the necessary privileges.
Step 1: Open Site Shell
You can click on the Site Shell button located underneath the name of your site, or right-click on the site you wish to connect to via TCP/IP in Local’s sidebar and select Site Shell.

Step 2: Run Commands
In your Shell, run this command, which will Allow root to connect via 127.0.0.1.
mysql -e "CREATE USER 'root'@'127.0.0.1' IDENTIFIED BY 'root'; GRANT ALL ON *.* TO 'root'@'127.0.0.1';"
Obtain the TCP/IP port on which MySQL is currently running.
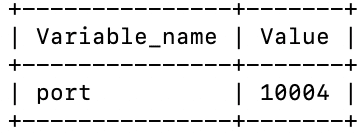
mysql -e "SHOW VARIABLES WHERE Variable_name = 'port';"- Here’s an example of what you should see after running those commands:
Step 3: Test and Save Connection
TablePlus
There are many tools available that you can use to connect to your Local site databases. One available tool is TablePlus, an easy-to-use database manager for Windows and Mac.
note
If you are already a TablePlus user, you can make use of the TablePlus Add-on to quickly access the Local site’s database within TablePlus. If you have any questions about the add-on itself, please see the dedicated category in the forums.

Step 1: Download and Install TablePlus
Step 2: Create a Connection
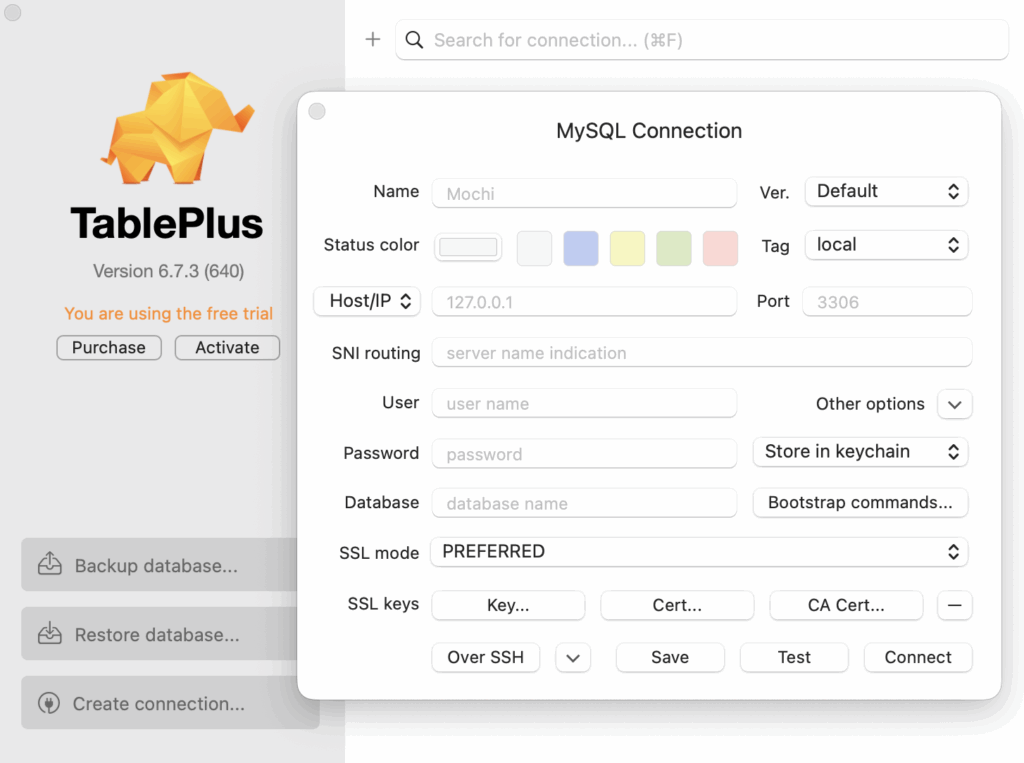
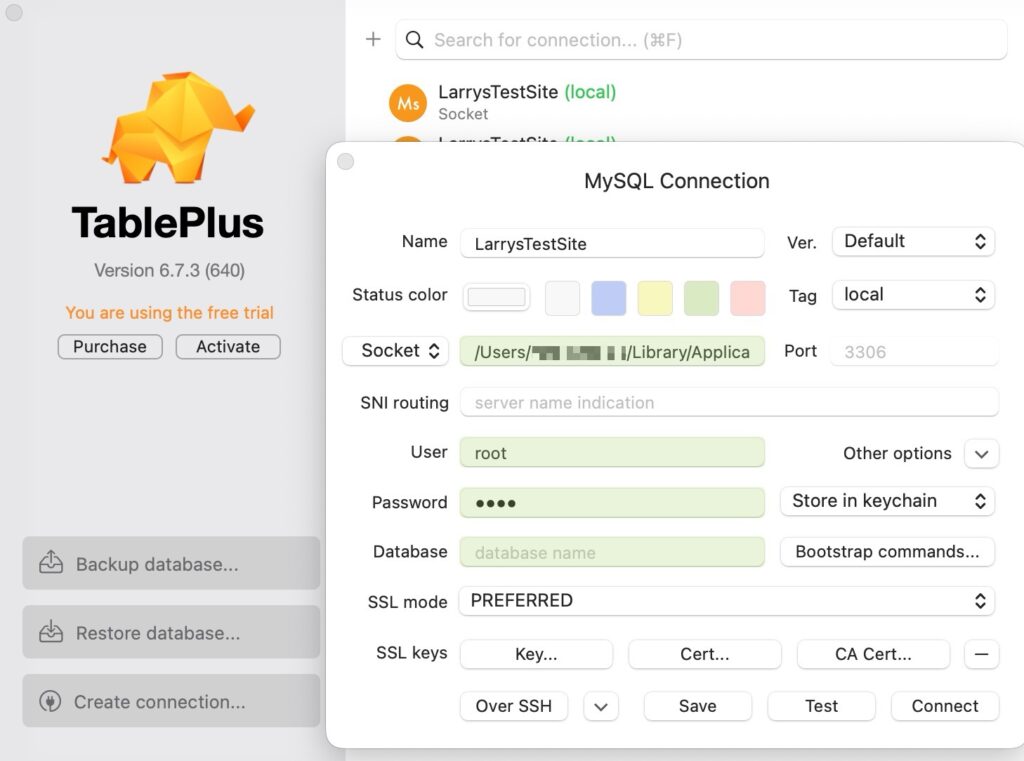
Within TablePlus you’ll select Create connection, and then choose MySQL to see a prompt like this:
Step 3: Copy Local Database Details
With your site Started in Local, navigate to the Database tab where you can find the details to connect. The steps will be similar to the sections above, depending on whether you choose to connect via Socket, or TCP/IP. Once you’ve copied over what you need from Local, click “Test”. You should see several green fields if the connection was established successfully. If so, click “Connect” and start editing, but be sure to keep Local running while you’re using TablePlus.
If you need more information TablePlus has a lot of great resources on this page.