Manually Restore a Cloud Backup with Restic
Cloud Backups makes use of Restic to create and manage the backups for a site. One of the main features of Restic is that it creates incremental backups which mean that only files that have changed since the last backup are uploaded and saved to the cloud. As a result, less space is used on your cloud provider, and less time is wasted waiting for data to upload!
note
This process is focused on manually restoring a backup from your cloud provider. Only follow the instructions below if you are unable to restore a site using the built-in restore process of the Local Cloud Backups add-on.
If you’re looking for more general information on using the Cloud Backups add-on, see this help doc.
Table of Contents:
So why don’t all backup tools make use of incremental backups? The main drawback to Restic (and incremental backups in general) is that more work is required to view and restore individual backups.
Using Local’s Cloud Backups add-on is the easiest way to work with backups for your Local site, but if for some reason something, everything breaks and you can’t use Local, you can still manually access and restore the site backups using Restic.
We’ll go into more detail, but the general process for manually restoring a backup looks like:
- Install Restic.
- Download the Restic repo from your cloud provider.
- Use the “Manual Recovery” password from your Local account to access and work with the Restic repo.
- Restore a specific snapshot.
- Optional: Import the backup into Local.
Install Restic
Restic isn’t a Local-specific tool and is available for many different systems. You can install Restic by following the instructions for your specific system.
To verify you have everything installed, open a terminal and try running the restic command. You should see more information about working with Restic!

Download the Restic Repo
If you haven’t used Restic before, it’s good to learn a few terms. Each individual backup is called a snapshot. All of the snapshots for a site are stored within a folder called a restic repo.
When using the Cloud Backups add-on, each site will create a new folder within the LocalBackups folder of your Cloud Provider.
Each of these folders is a restic repo, and is named with a unique hash that looks something like bec9b8c9-8149-462b-a175-471c4a5635ae.
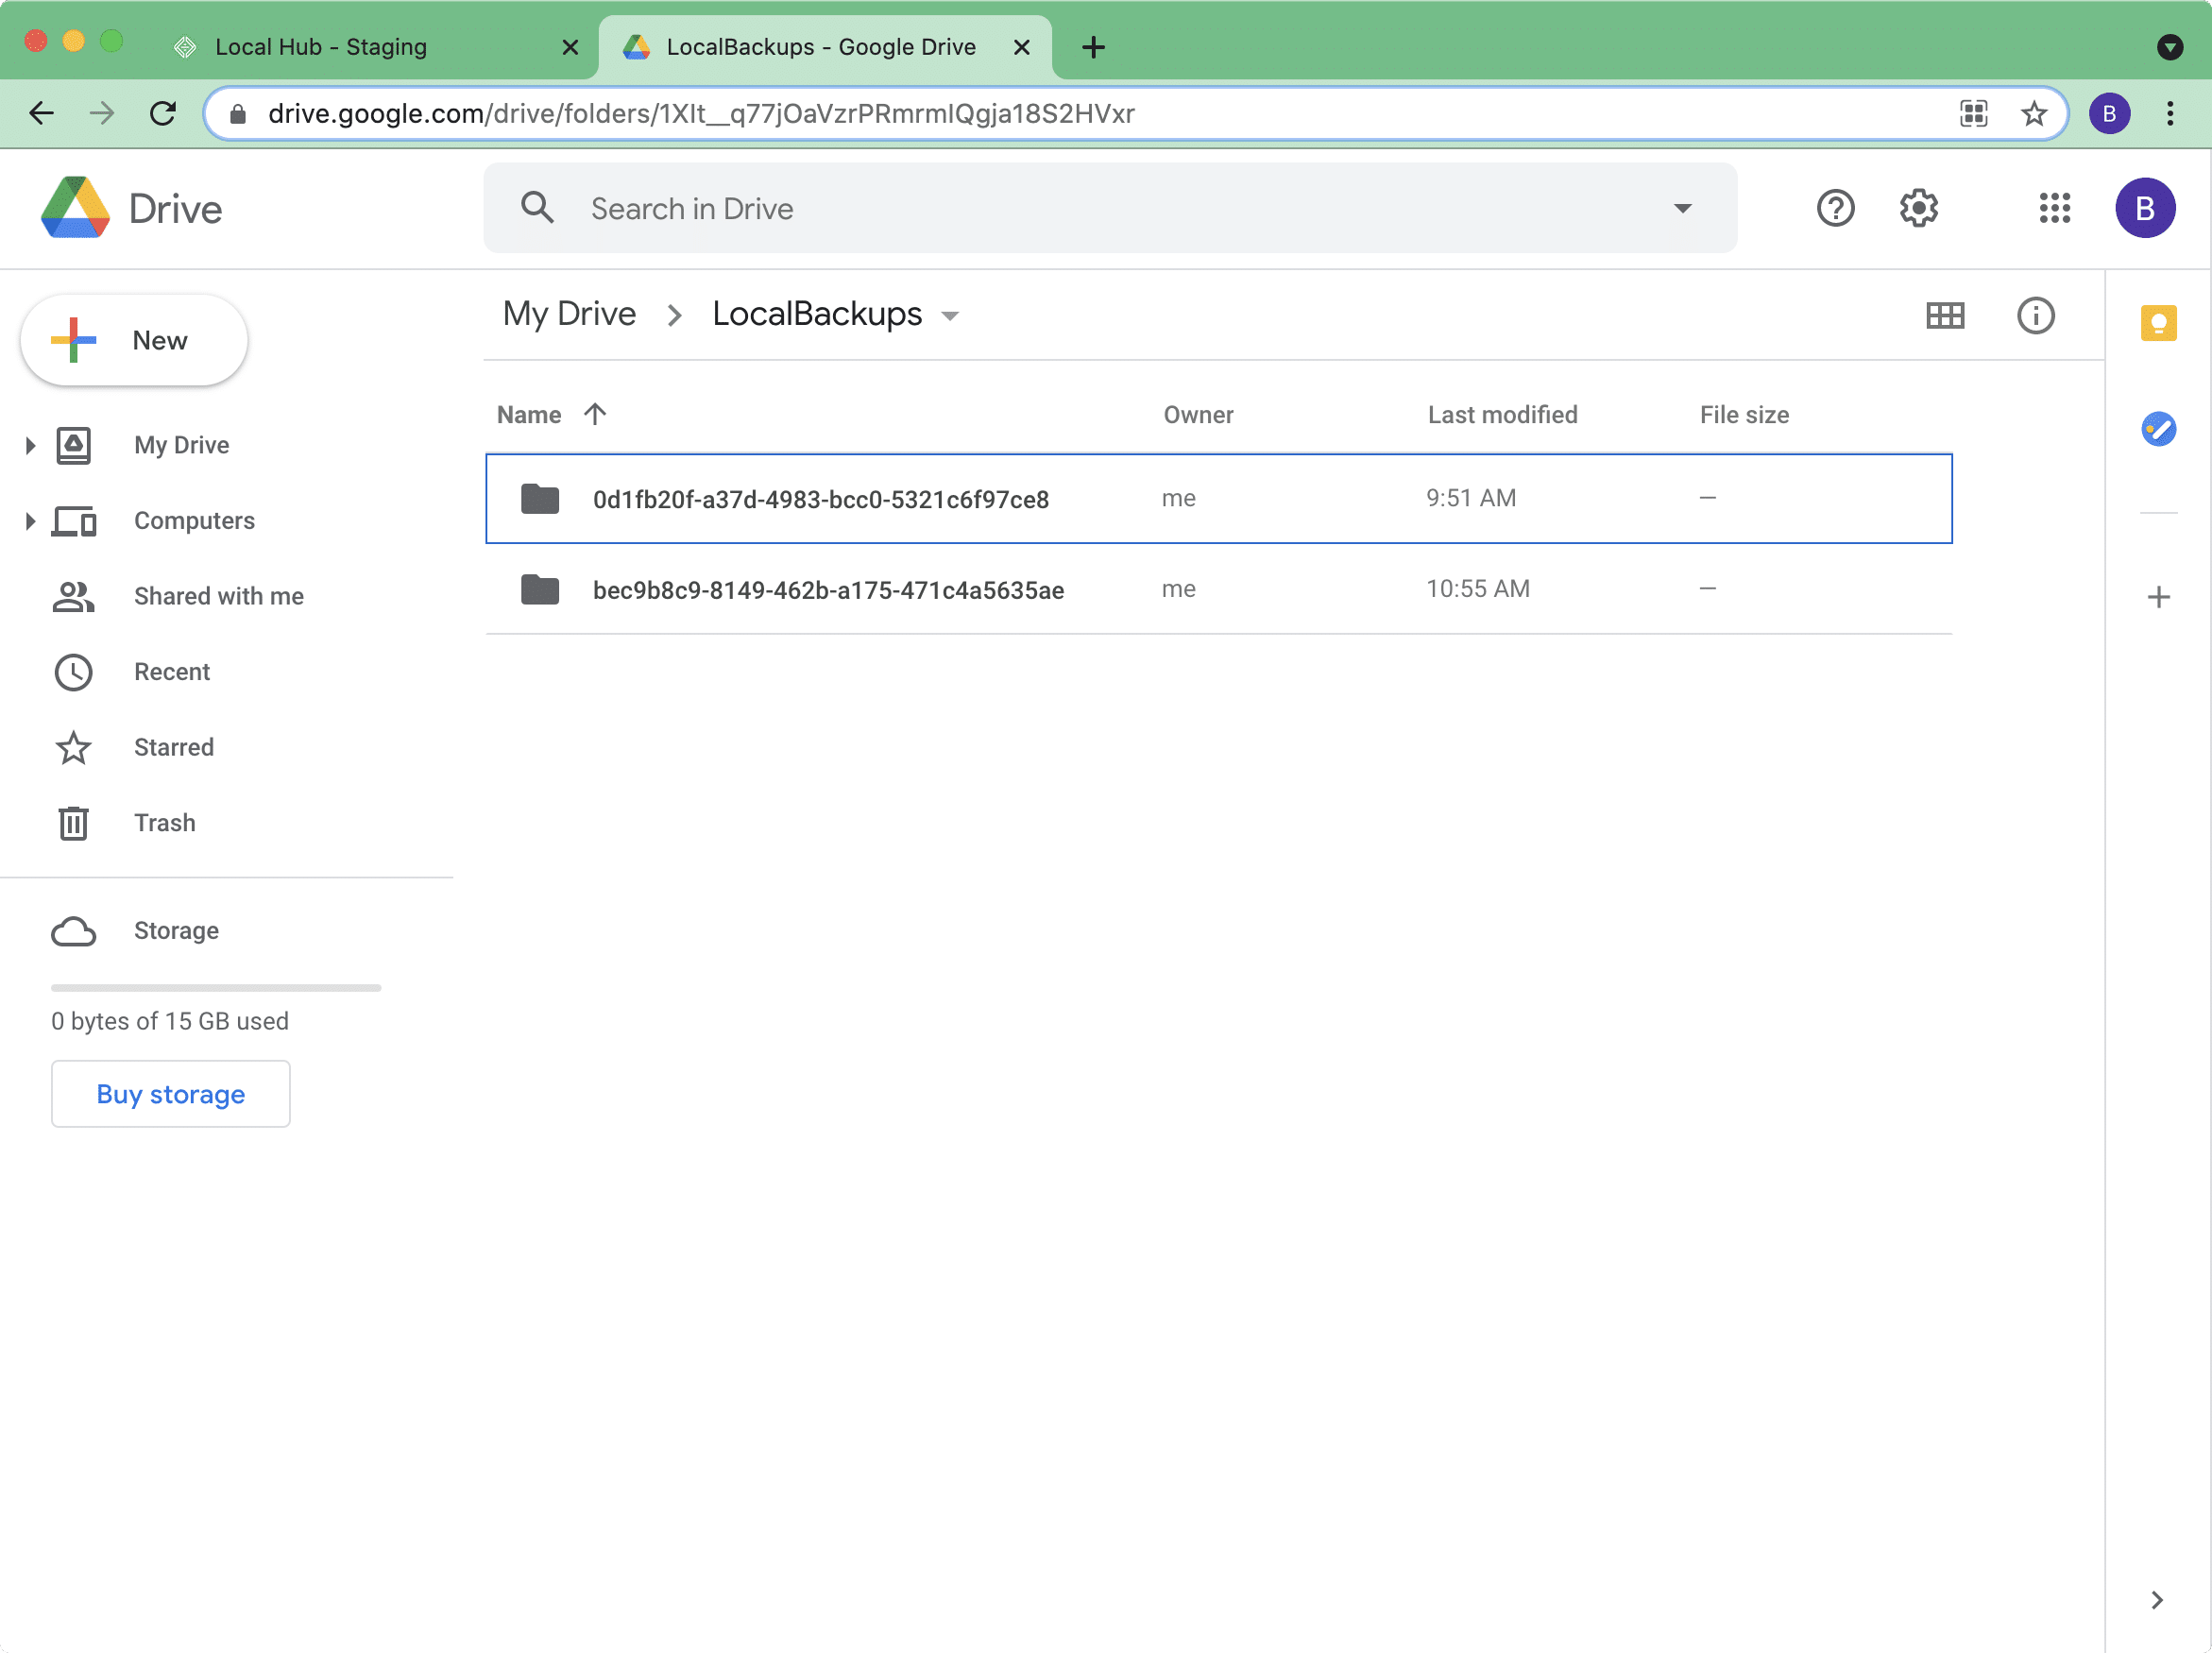
There’s no need to download the entire LocalBackups folder, you only need to download the Restic repo for the site you want to restore. You’ll likely need to unzip this file someplace on your machine.
note
You can do most of these steps wherever you’d like on your computer. To make things easier to follow within this help doc, I recommend creating a folder named manual-restore on your desktop to keep everything organized.
Within this folder, create a folder named site where individual snapshots will be restored. Next, extract the Restic repo into a folder of its own. If you’re following these guidelines, your folder structure should look something like this:
~/Desktop/manual-restore/
 ├ bec9b8c9-8149-462b-a175-471c4a5635ae  <- The restic repo
 └ site                                  <- Restored snapshots
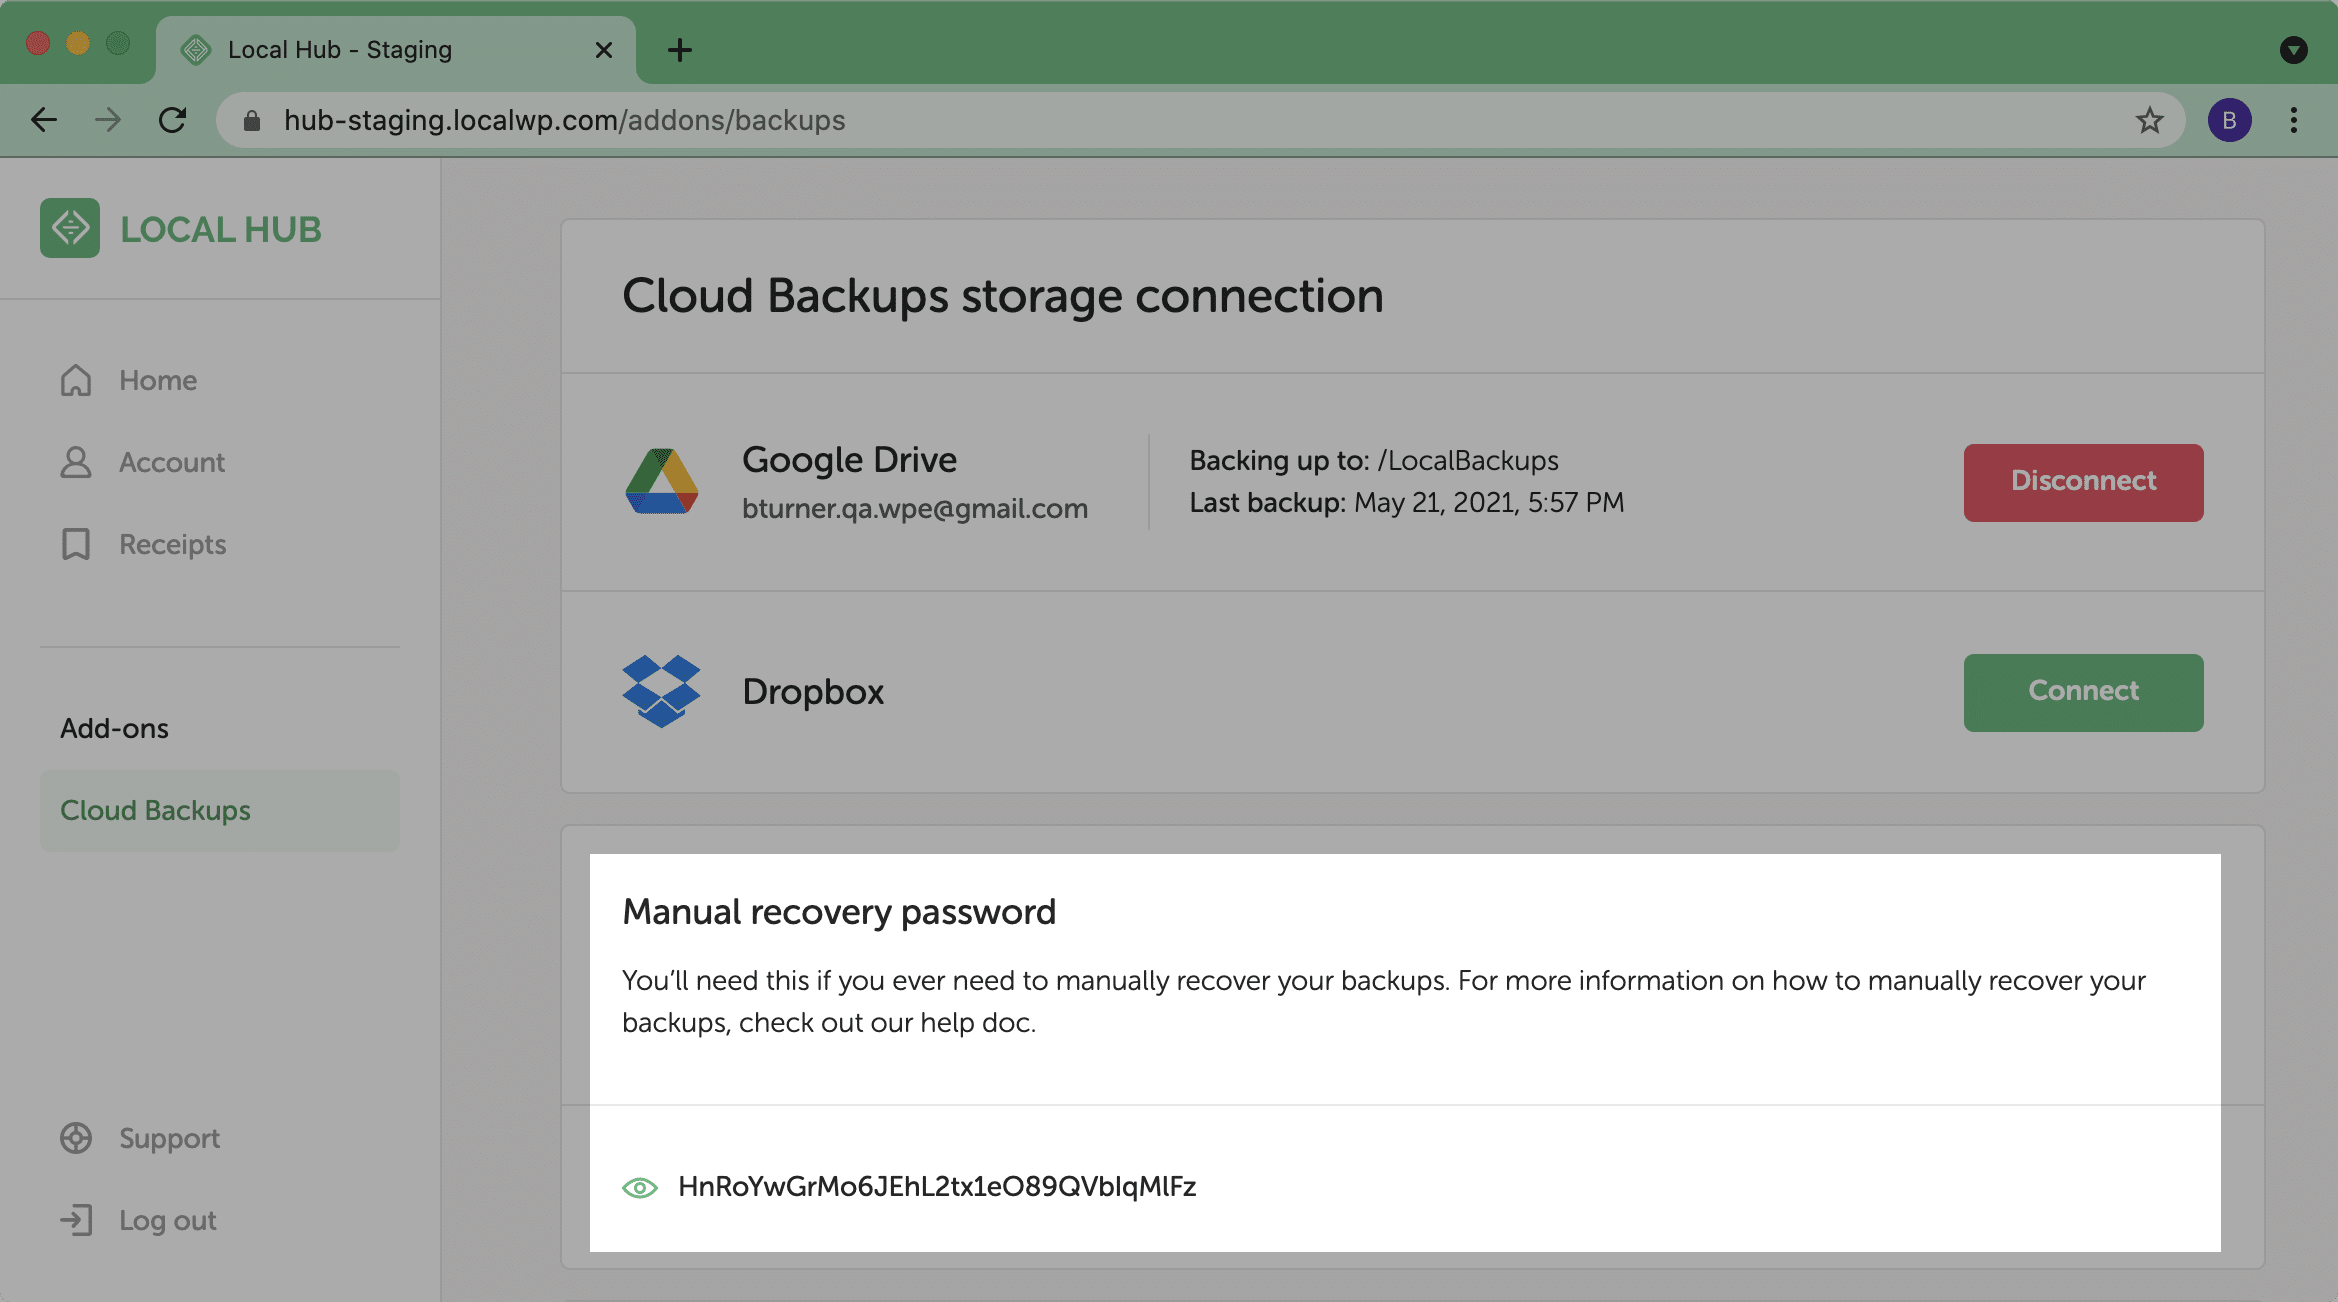
Find the Restic Repo Password
One additional feature of Restic is that the Restic Repo is protected with a password. Your Local Account created this password for you when the cloud provider was connected. Navigate to the “Manual recovery password” setting on the “Cloud Backups” page of your Local Account.
Work with the Restic Repo to Restore a Snapshot
With the Restic Repo downloaded and your password ready, you now have everything you need to view snapshots of the site as well as restore a specific ones.
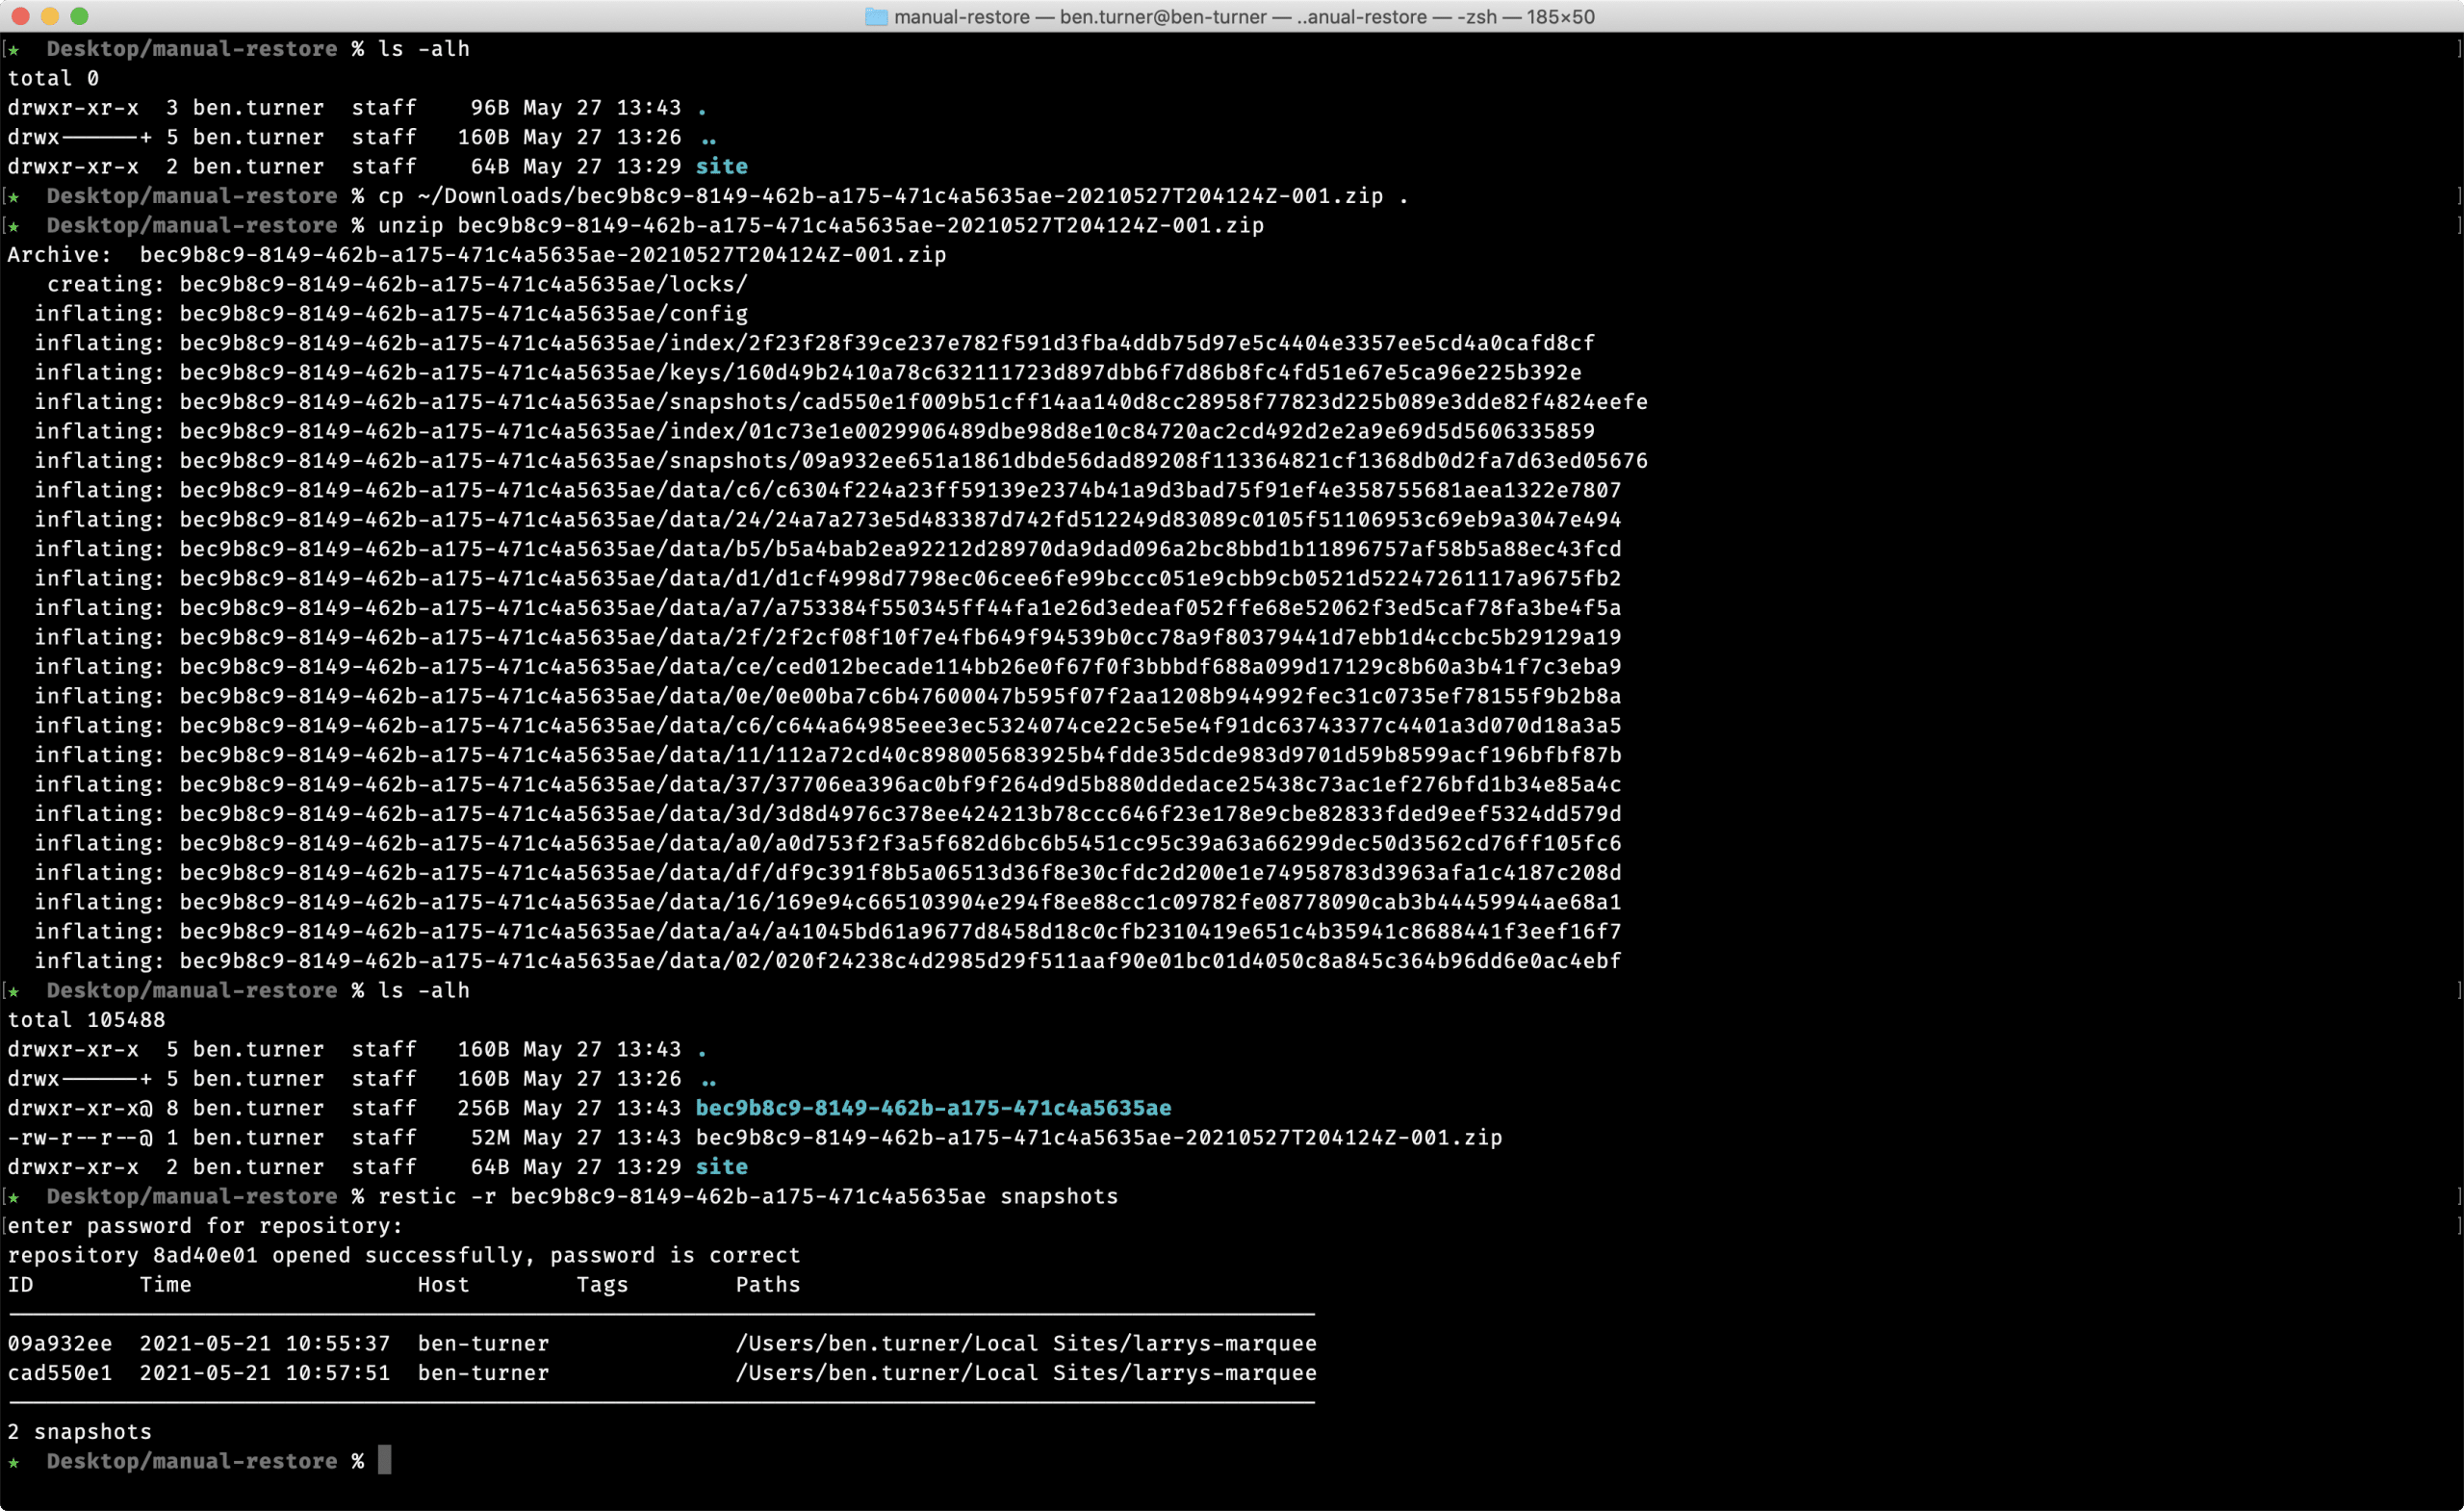
Using the folder examples from above, open a terminal and navigate to the ~/Desktop/manual-restore folder.
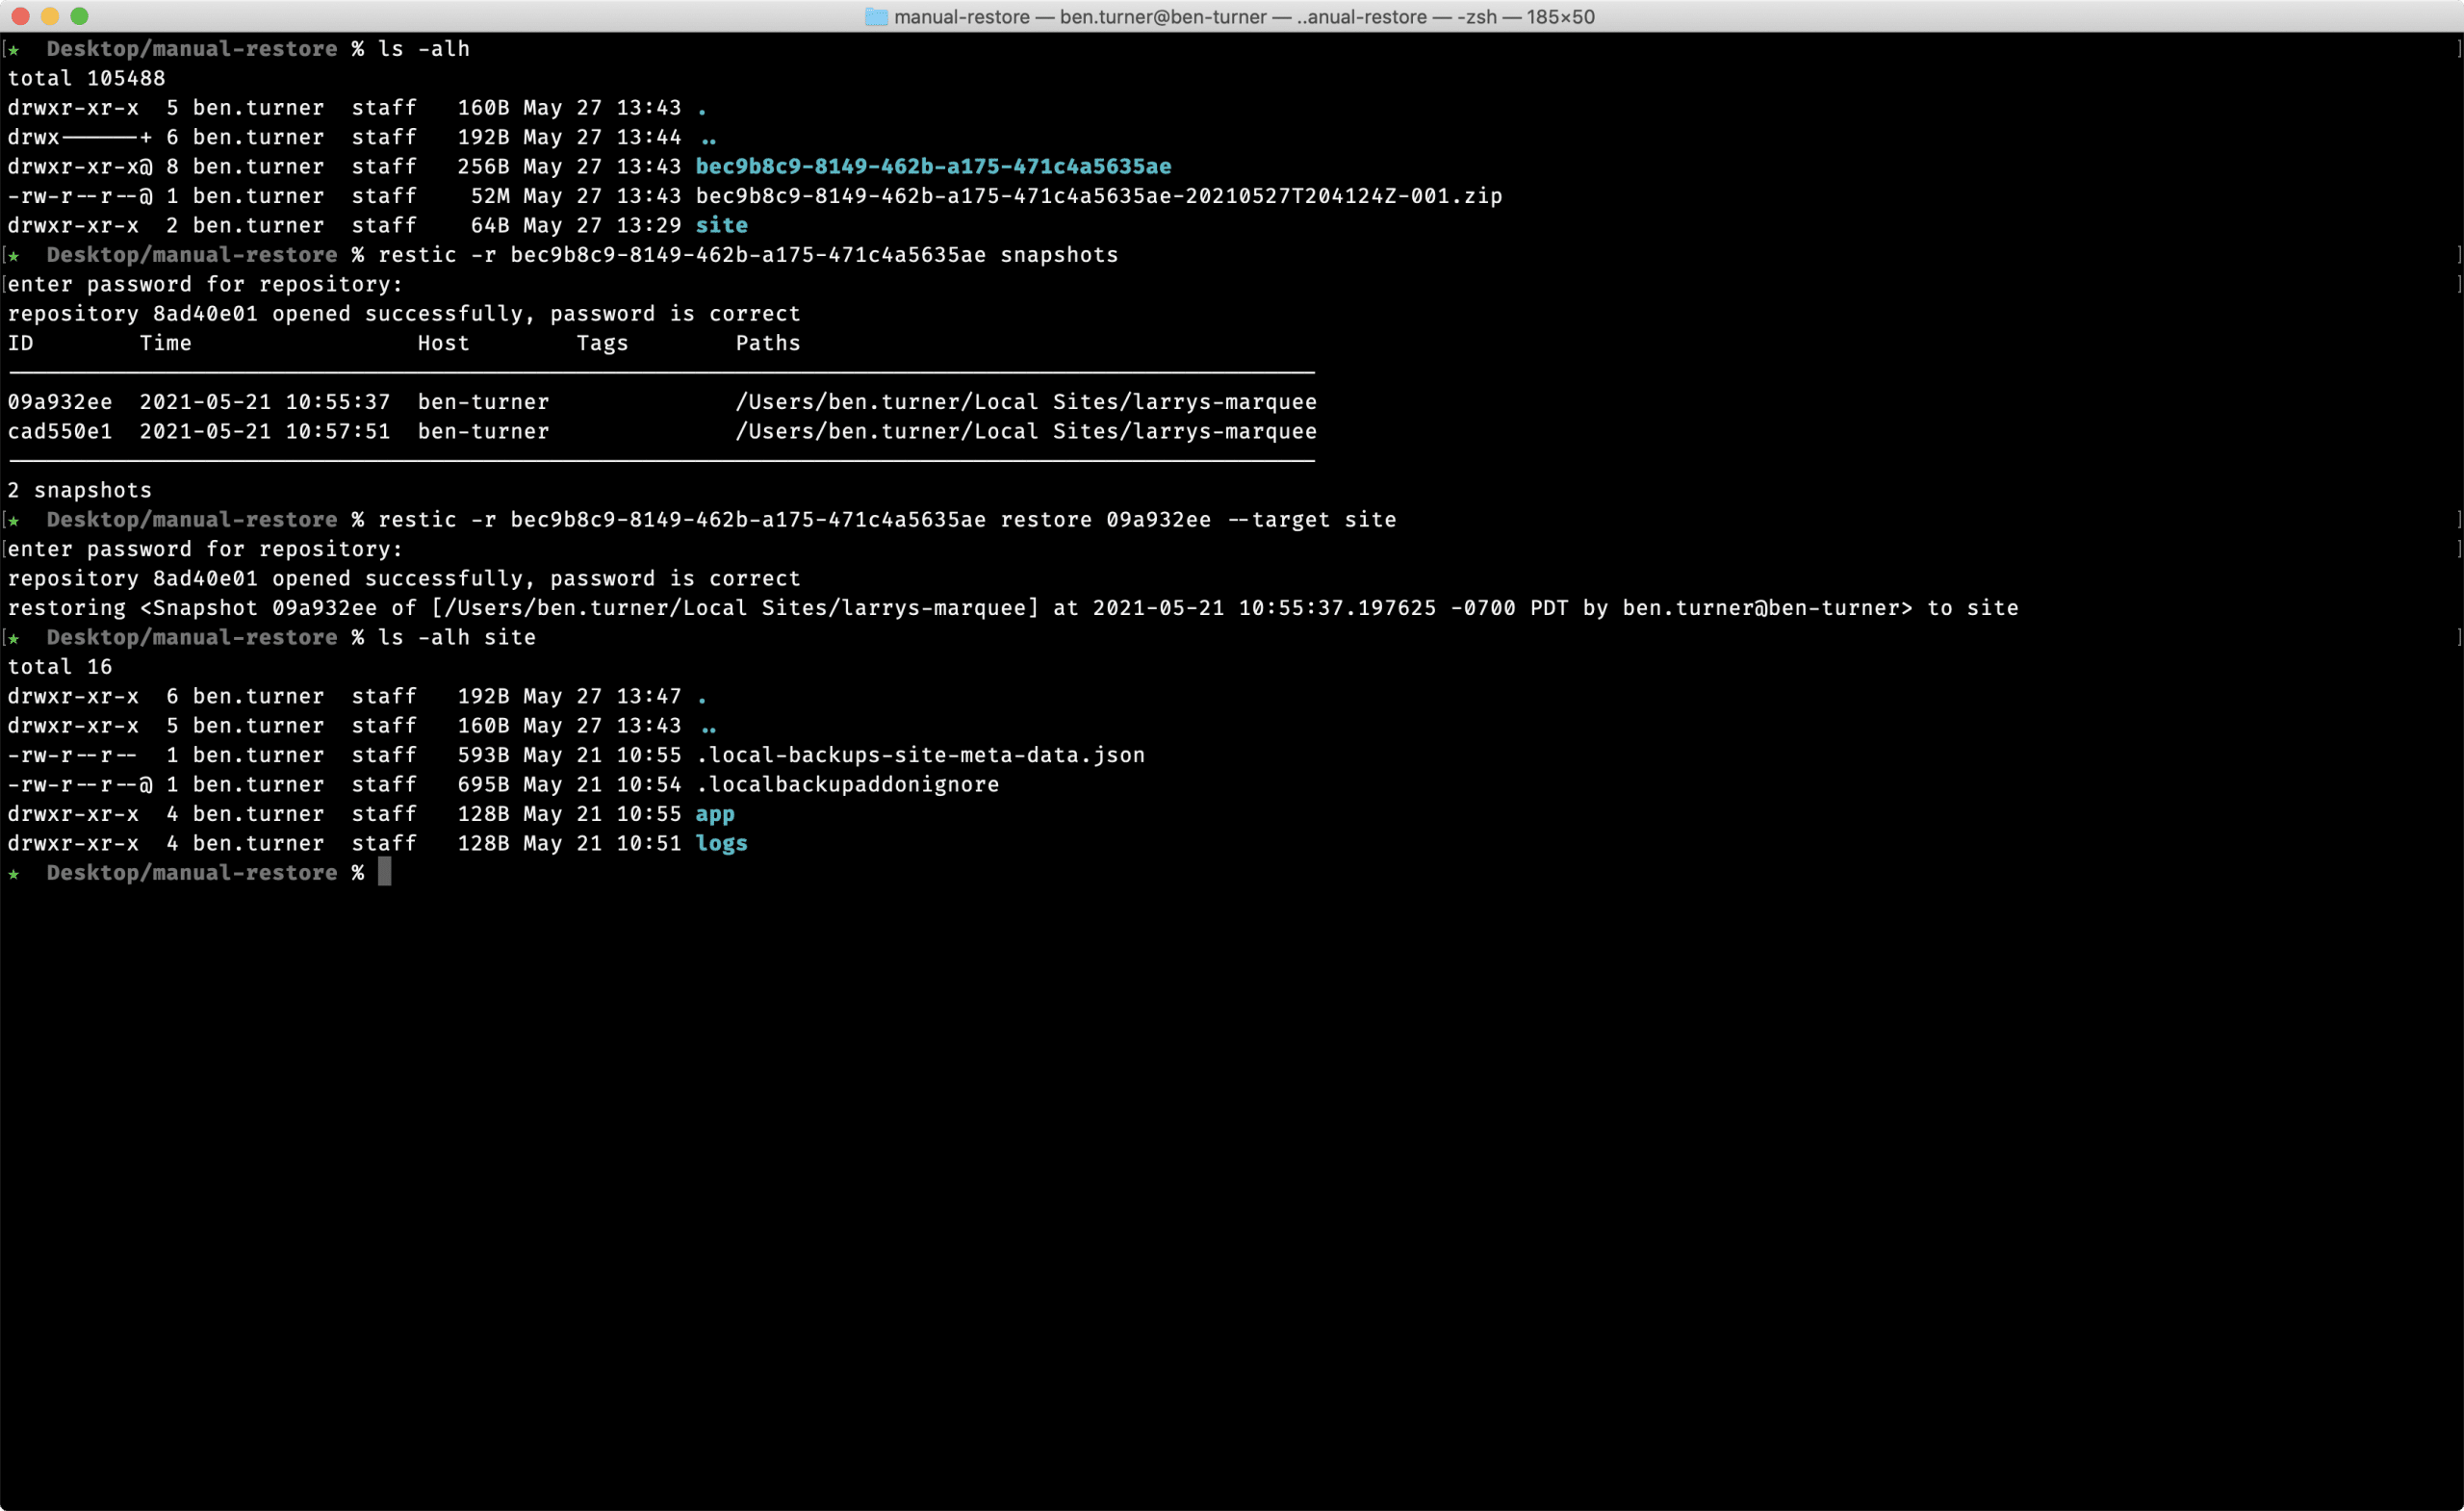
From there, we can list the snapshots within the restic repo by running this command:
restic -r bec9b8c9-8149-462b-a175-471c4a5635ae snapshots
Restoring a snapshot is easy by using the snapshot id along with the --target parameter for where you want the snapshot restored to. In this example, we use the site folder we created earlier:
restic -r bec9b8c9-8149-462b-a175-471c4a5635ae restore aabbccdd --target site
Import into Local
After working through the above steps, you should have everything you need within the site folder to restore your local site! The easiest way to import this snapshot into Local is to zip up the site folder and drag-and-drop it onto Local. See this help doc for a visual walkthrough of that process!