Develop with Local and GitHub
Local makes it easy for you to quickly get to the business of creating and managing a WordPress site on your local machine and lets you efficiently deploy your site to remote servers on Flywheel and WP Engine. Even if you don’t use Local to publish your code (maybe you prefer to use a service like DeployHQ, DeployBot, Buddy, or GitHub actions to deploy your code) it’s still a great tool for running a local server so you can test your code as you develop it locally.
But what if you want (or need) fine-grained control of the edits that are made to the code used on your site? What if you need to merge in different changes made to the same file by multiple developers?
That’s where version control systems like Git really shine. They’re a great way to keep track of changes made to your codebase. These tools allow you to track changes and collaborate with other developers when working on the same code.
Let’s walk through how to configure a site running in Local to make use of GitHub so that you get the best of what these two tools can offer your development workflow!
Table of Contents:
What is Git?
Git, GitHub, Github Desktop, GitLab, etc. what’s with all the similarly named but different things here? Well, Git is a version control system that powers several version control services like GitHub, GitLab, and more. To make matters even more fun, Git isn’t the only version control system out there, though it is probably the most popular. We don’t want to go too far down that particular rabbit hole, but if you’re new to this, it can help to know a bit more about the world of version control.
While it’s true that Git can be confusing and daunting to new users, fortunately, there are many learning resources, a learning lab, and even a simulator you can use to learn and practice with Git.
If you’d like to dive in a bit further into the differences between all of these, check out these resources:
- Difference Between Git and GitHub
- Git vs. GitHub: What’s the Difference?
- GitLab vs GitHub: Key differences & similarities
- Git 101: Git and GitHub for Beginners
Git is the most popular version control software and GitHub is the largest Git host, which is why we’re going to focus on using it with Local for this tutorial. GitHub Desktop is great for those of us who prefer a more visual interface over the command line, so we’re going to use it here too. If you’d rather use the command line for your Git workflow, you can use that instead.
Note, if this is your first time using GitHub and you haven’t already signed up, you’ll first need to create an account on GitHub. You’ll also need to install Git on your local machine so you can run Git commands locally.
Kick things off by creating a new site in Local
Open Local, click the plus sign (+) in the lower-left corner and fill in your site details to create your new site.
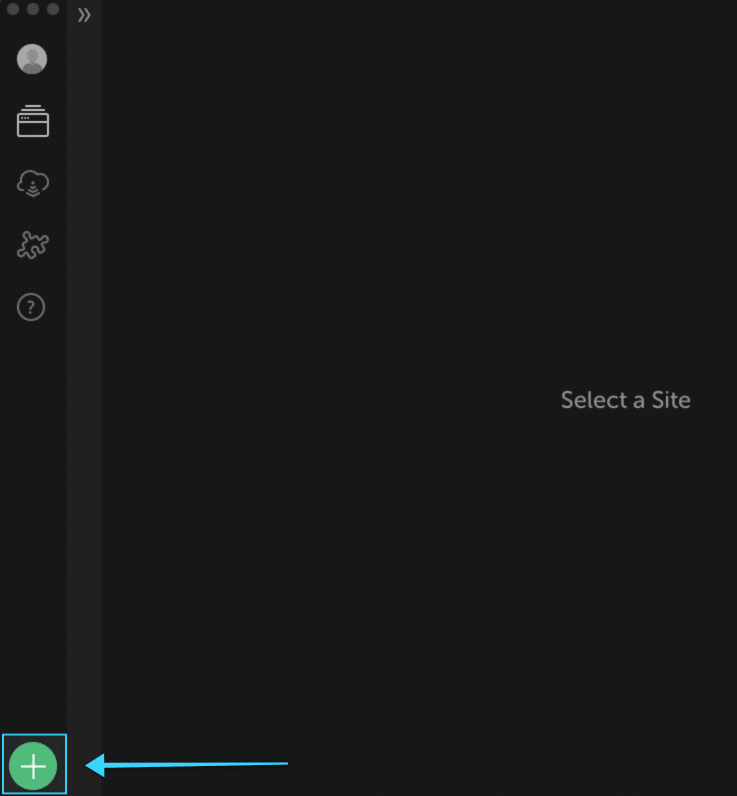
For our purposes here, Local’s really just going to be used to run the site so you can easily test your theme or plugin code, which you’ll manage in your Git repository.
Creating a new Git repository
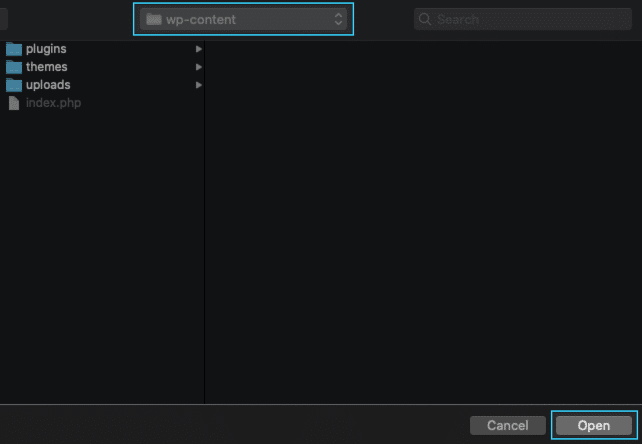
- In Local, right-click your site and select “Open Site Shell” in the menu that appears.

- Type
cd wp-contentto navigate to your site’s wp-content directory. If you only want to manage a theme or plugin in your repository, navigate into that theme or plugin directory (cd plugin/plugin-directory-nameorcd themes/theme-directory-name). - To initialize your repository, type
git initand hit return/enter.
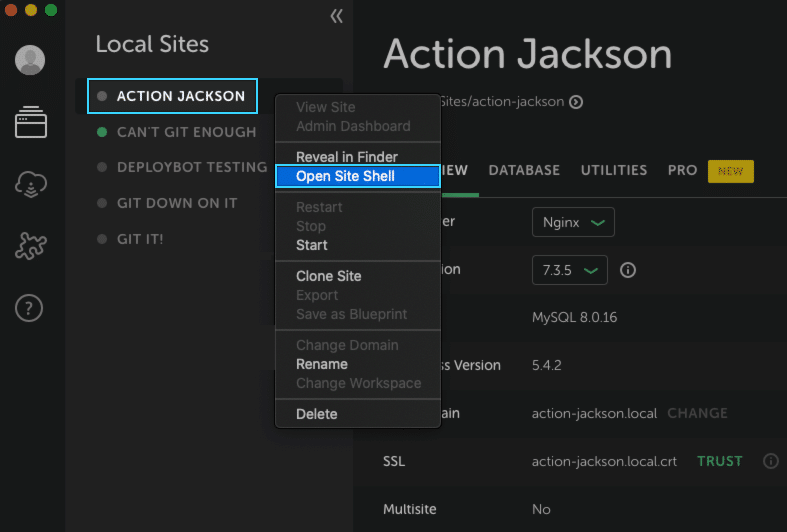

We’re only going to, at most, track the wp-content directory because like most managed WordPress hosts, here at Flywheel, we lock down WordPress core files. In order to avoid conflicts later, let’s just track the code that we’re responsible for. If you only need to track the code for a specific custom theme or plugin, create your repository in that theme or plugin directory.
Now you’re ready to add the repository in GitHub desktop. If you prefer to use the command line to manage your repository, feel free to skip the rest of this help doc.
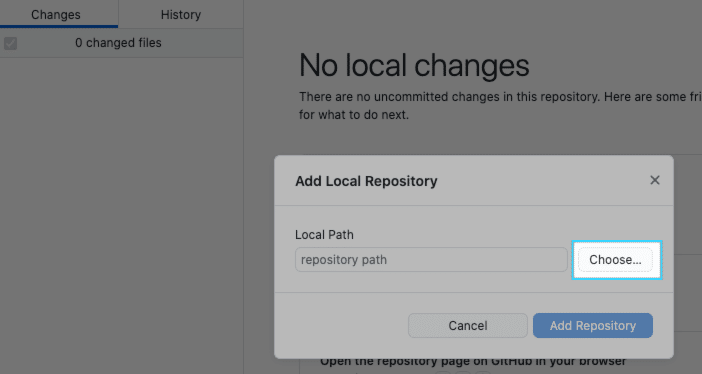
Add repository in GitHub Desktop
So that you can manage your repository in GitHub Desktop, you’ll first need to add it there.
- Open GitHub Desktop and go to File > Add Local Repository.
- In the Add Local Repository dialog that pops up, click “Choose” and navigate to the directory where you initialized your Git repository.


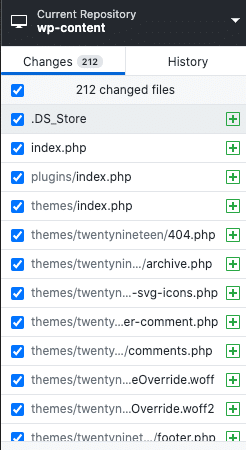
- In the left sidebar, you should now see a list of changed files showing all of the files in the wp-content directory (or your theme or plugin directory).

Commit changes
Commit your repository via GitHub desktop by entering your Summary (initial commit is pretty standard for a repository’s first commit) and clicking “Commit to master.”

You can change the default branch (after your first commit) with git branch -m newname in the command line.
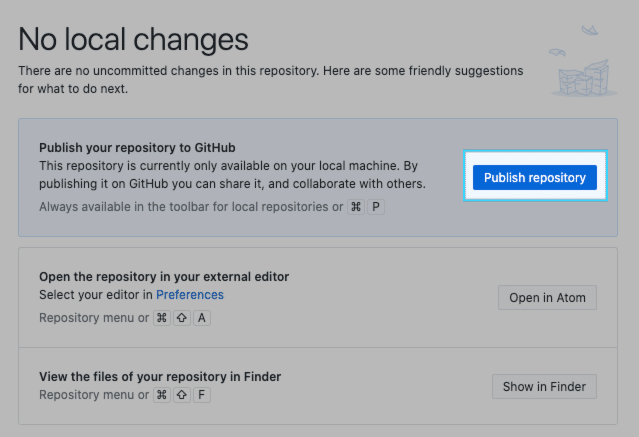
Publish repository
Now that you’ve committed your changes to your local repository, you’re ready to publish/push those up to your GitHub repository.
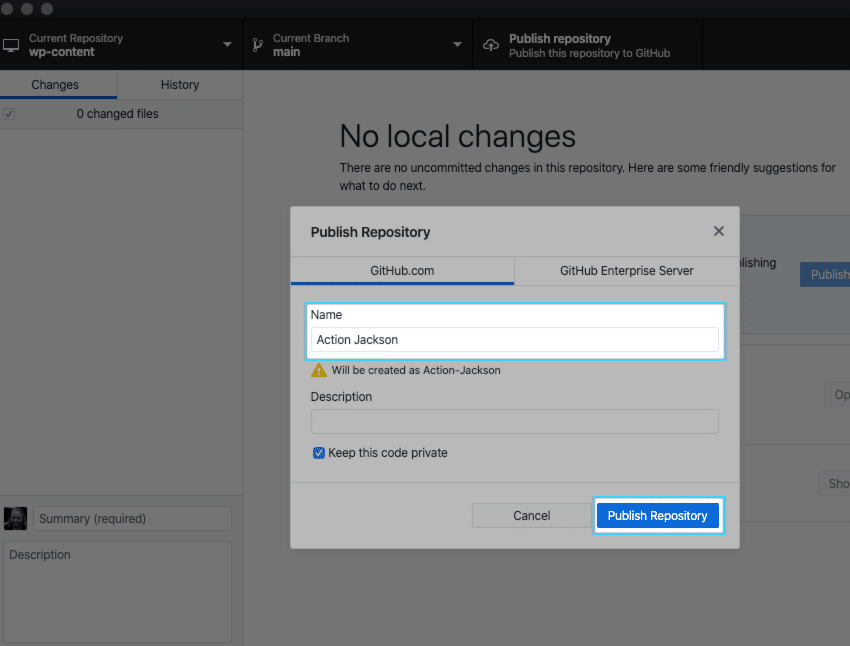
- Click “Publish repository” to bring up the Publish Repository dialog box.

- Update the name field with your correct repository name and click “Publish Repository.”

Next steps
Now that you have your Git repository set up locally and at GitHub, what’s next? To get the most out of your new version control setup, we recommend defining your workflow, based on best practices and the needs of your team. Use the following resources as inspiration for creating your optimal workflow:
- Version Control Best Practices
- GitHub Best Practices
- Source code management (scroll down to the Source code management best practices section)
When you’re ready to deploy your repository from GitHub to Flywheel, check out these handy help docs and resources: