Multisite with Local
Table of Contents:
What is WordPress Multisite?
A WordPress multisite network (or “multisite” for short) is a collection of sites that all share the same WordPress installation and database. These sites can also share plugins and themes that can be managed and updated network-wide. Multisite installs are great for projects that include an umbrella site.
For example, a University might want to use a WordPress multisite. This would allow them to have all students and professors contained within one WordPress installation, but have each department manage the content for their own subsite!
Types of Multisites:
There are two types of WordPress multisites:
- Sub-Directory (also called a “Path”)
- (example.com/site1, example.com/site2)
- Sub-Domain
- (site1.example.com, site2.example.com)
Multisites aren’t always the best solution
Not every project is a good candidate for a multisite. This article on WordPress.org has some great things to consider before using a multisite for your project:
Limitations of Multisite with Local:
- Local Connect is not compatible with multisites.
- Domain Mapping is not available. More information on what this feature is can be found in here: WordPress.org: WordPress Multisite Domain Mapping
Create a new Multisite in Local
Creating a multisite in Local is easy as long as you keep a couple of things in mind!
You’ll need to have Local’s Router Mode set to “Site Domains.” Multisites won’t work in Local if the Router Mode is set to localhost.
More details about Local’s Router Mode feature can be found in this help doc.
The steps below will help walk you through creating your multisite in Local!
- Click on the green plus symbol in the bottom left of the app window.
- Name the site, and click Continue.
- Choose your environment type, and click Continue.
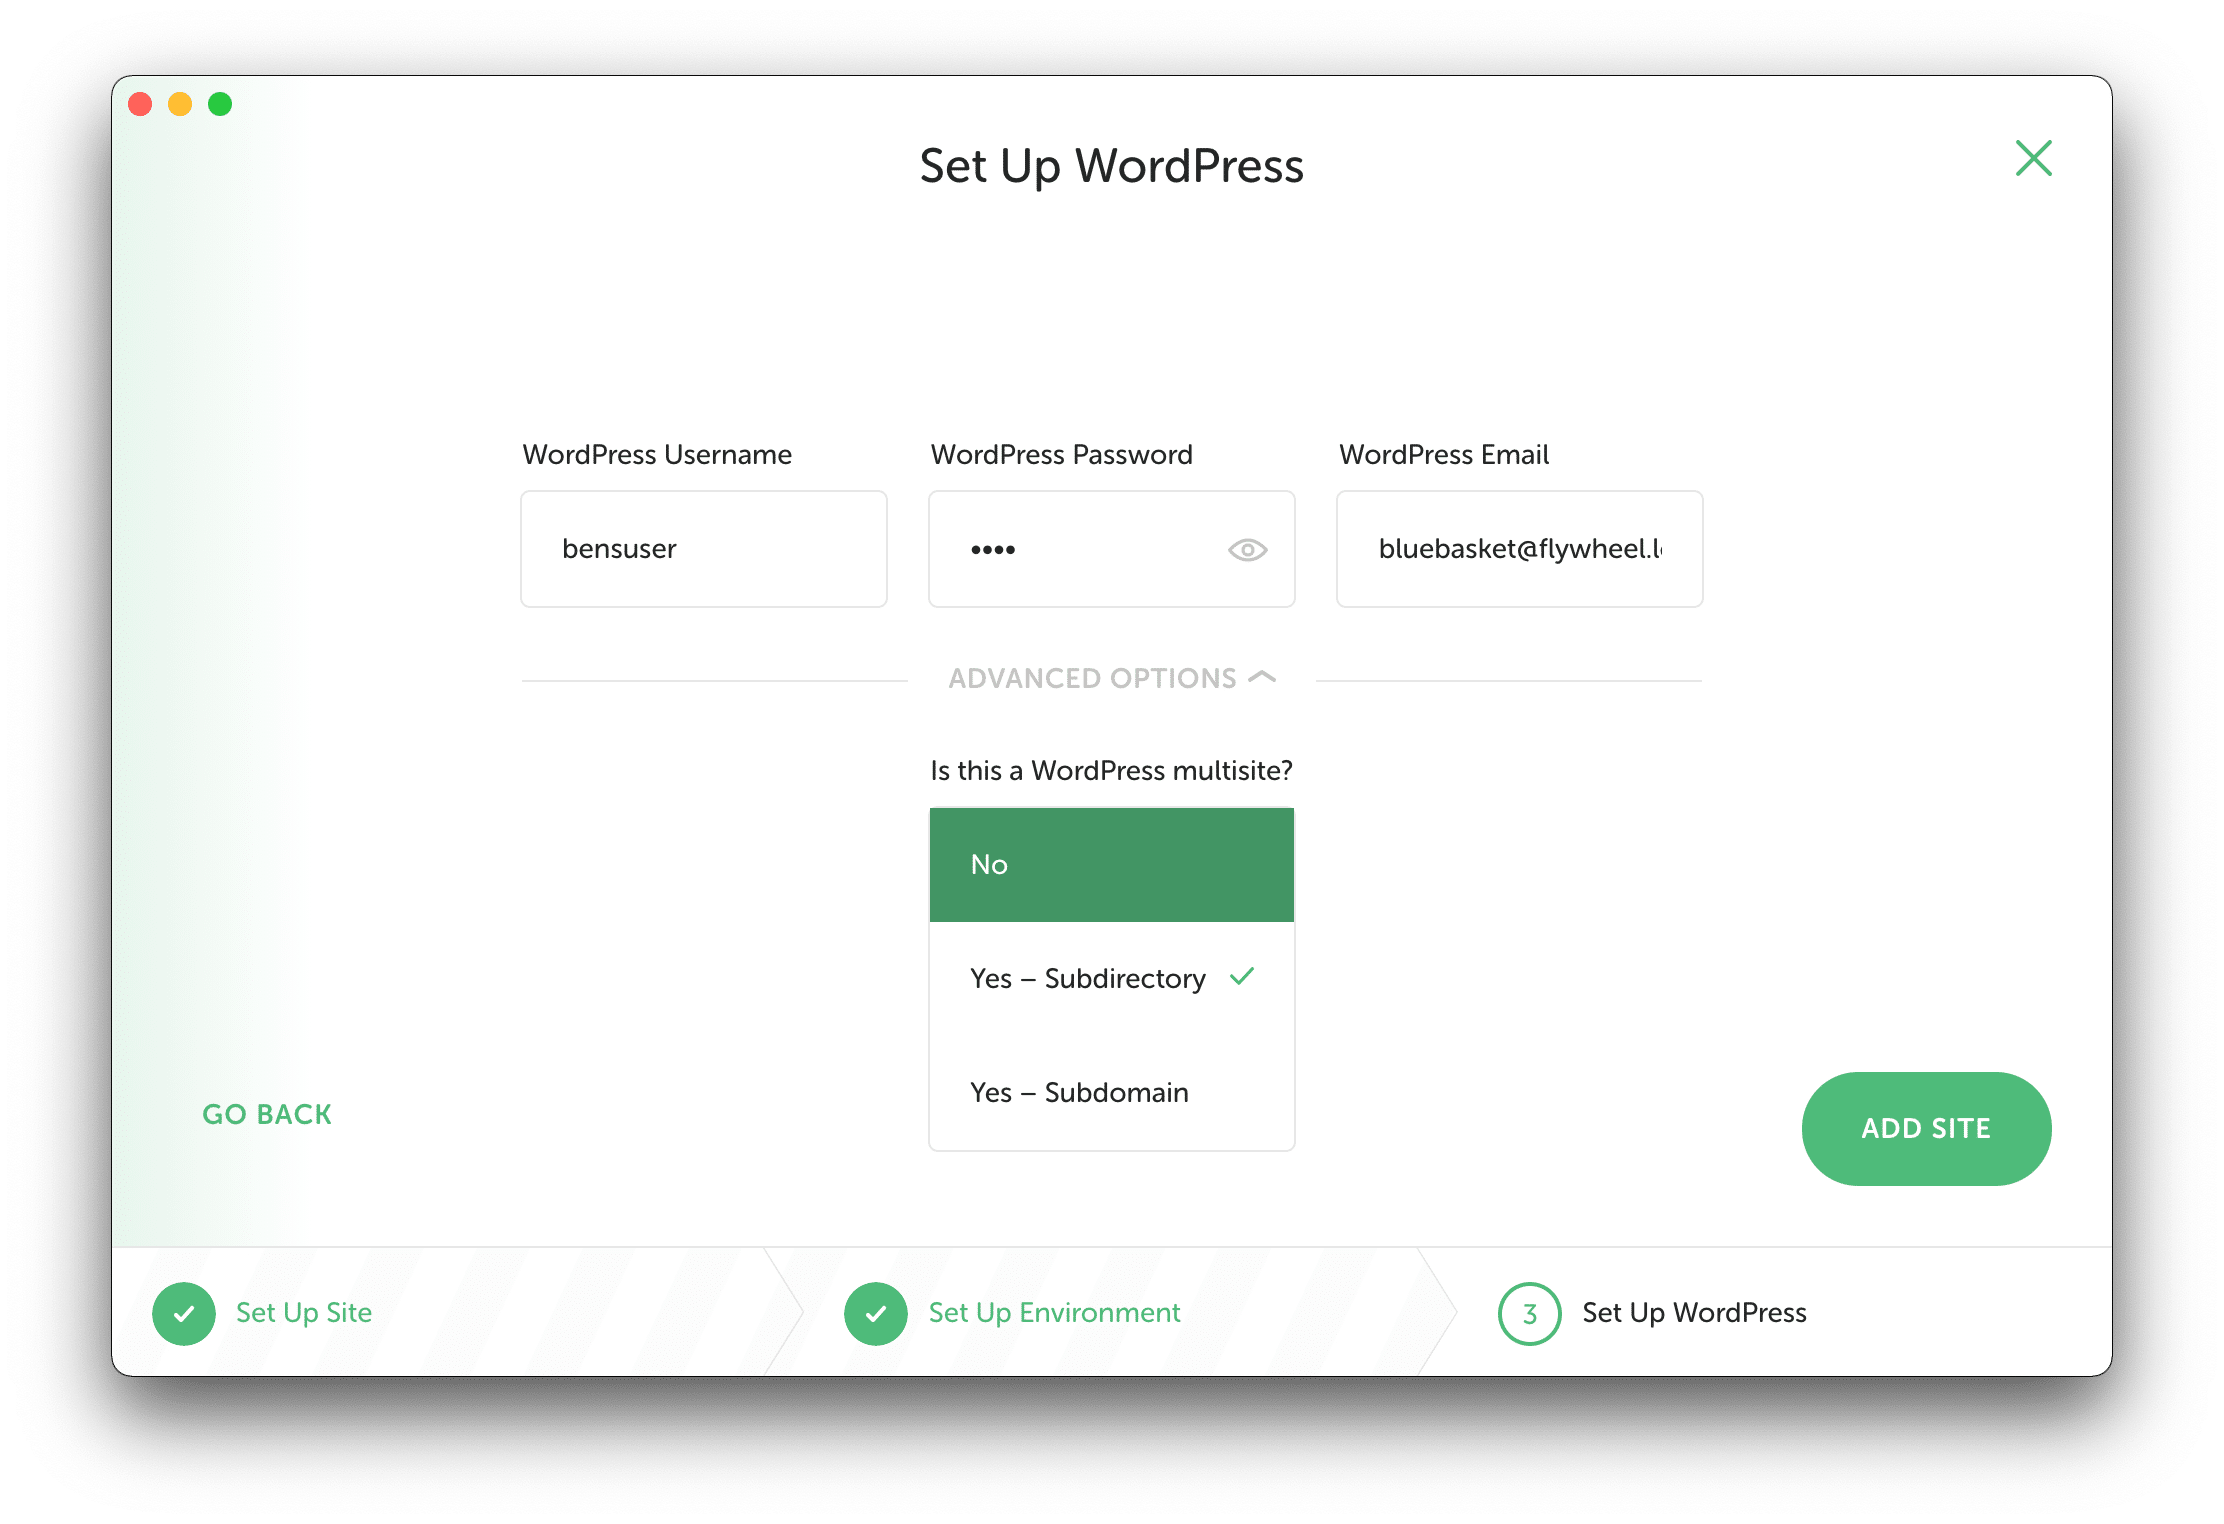
- Enter in the username, password, and email address you wish to use.
- Click the Advanced Options and select the type of multisite to install.
- Click Add Site to finish creating your site!
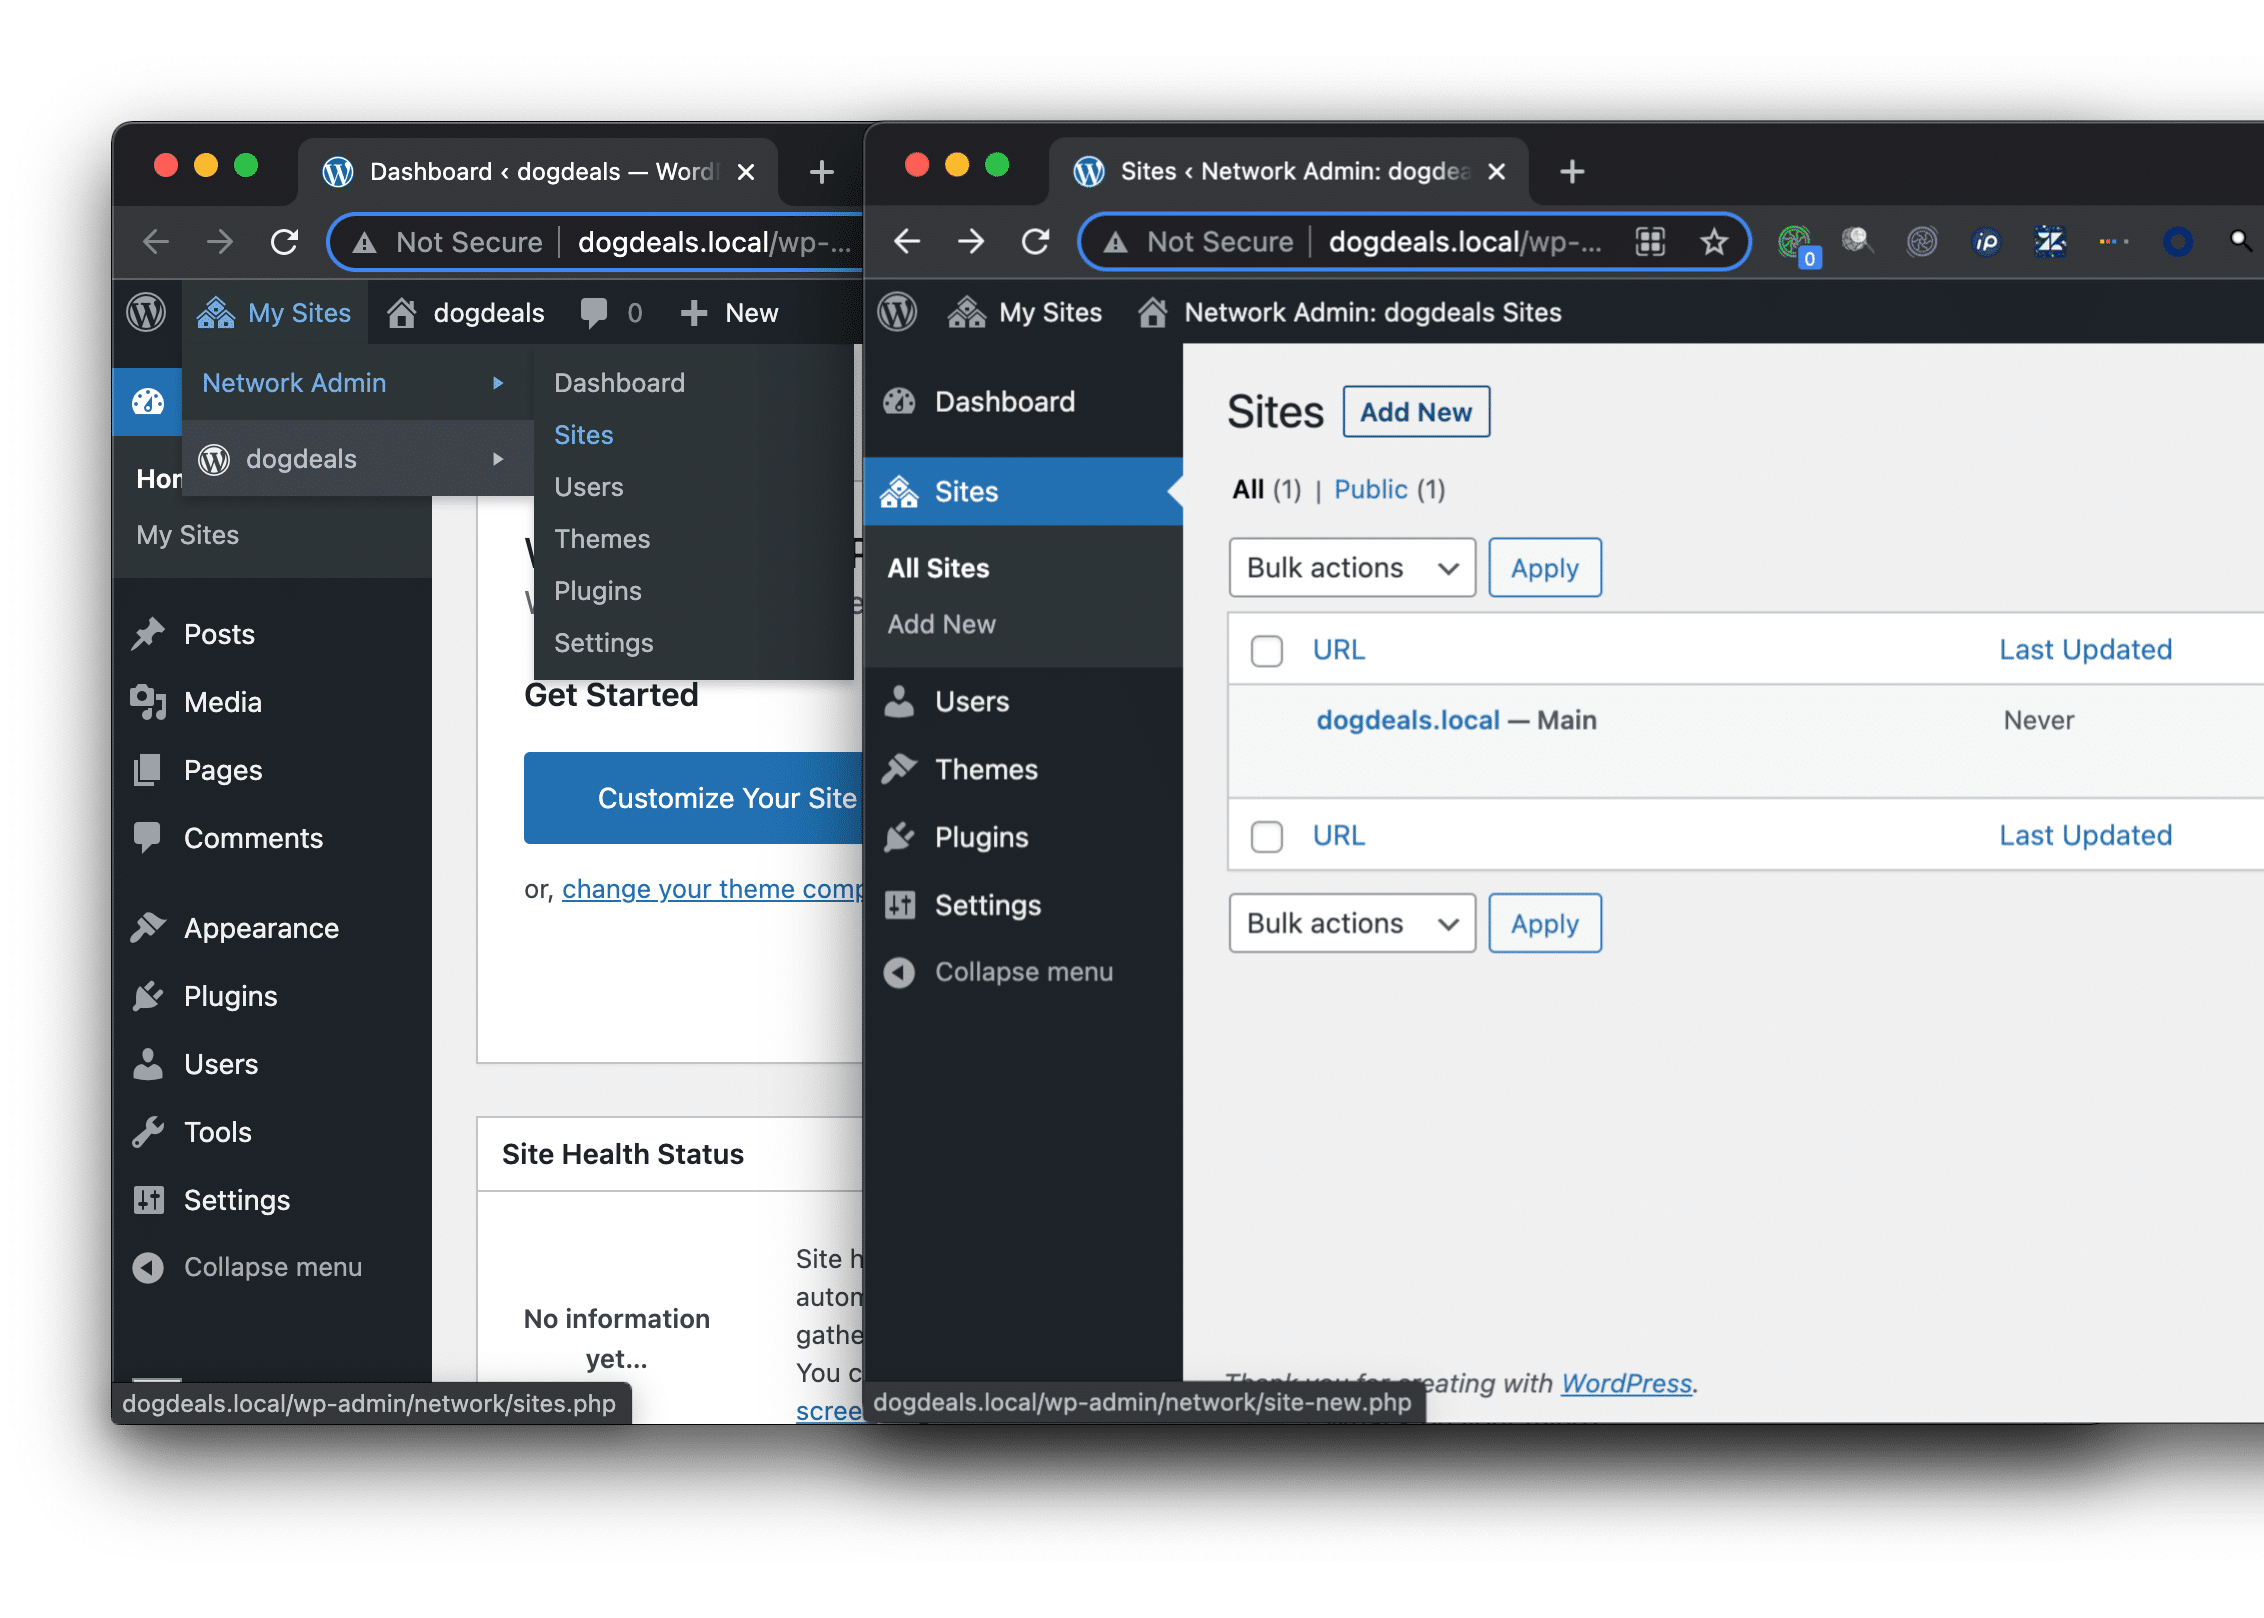
Once Local finishes building the site, you can verify that everything is working by creating a new subsite!
To do this, log into the WP admin and navigate to “My Sites > Network Admin > Sites” and click the “Add new” button.
Syncing Subdomains
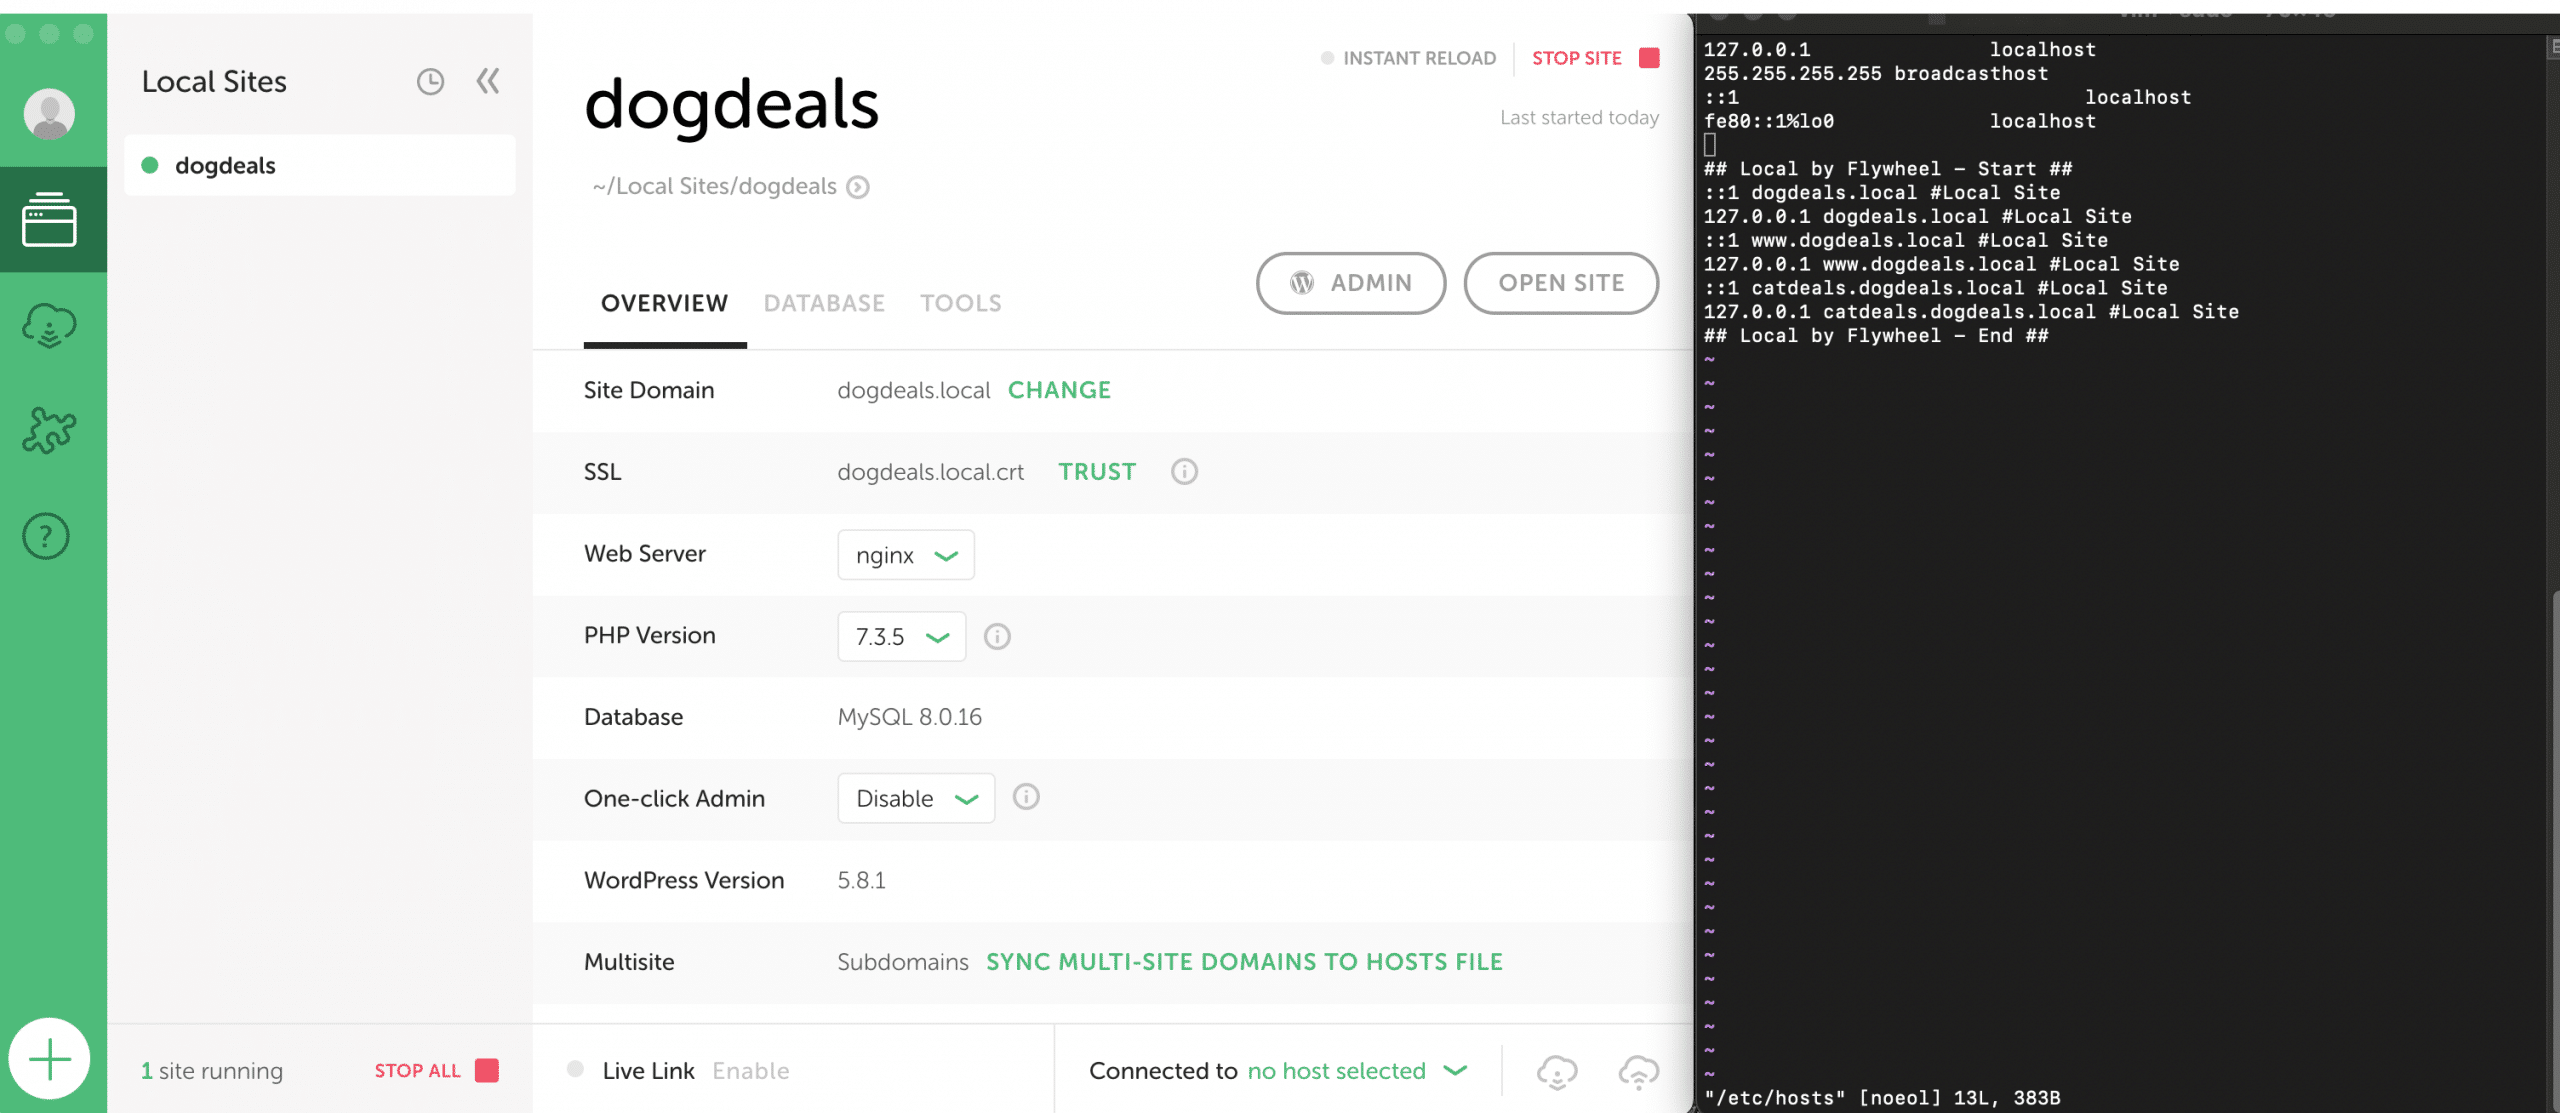
Because subdomain multisites involve creating additional domains they take a little more effort to register those domains with the computer.
After creating a new subsite in WordPress, navigate to Local and click the “Sync Multi-Site domains to hosts file” button.
This will query the WordPress installation and find all of the subdomains of the subsites and update the computer’s hosts file so that the browser can find the correct WordPress site.
Import a WordPress Multisite into Local
*Note: At this time Local Connect is not compatible with WordPress multisite.
Because multisites require configuration changes to the server software (like nginx or Apache), it’s a more manual process to import a multisite than it is to import a regular WordPress site.
To import your multisite you’ll need to follow the steps below!
- On your remote environment, create a Backup of your site and download it to your Desktop. Specific instructions for creating a backup on Flywheel and WP Engine can be found here:
- Create a new, blank multisite within Local by following the steps in the first section of this help article. This will ensure the server configuration is correct.
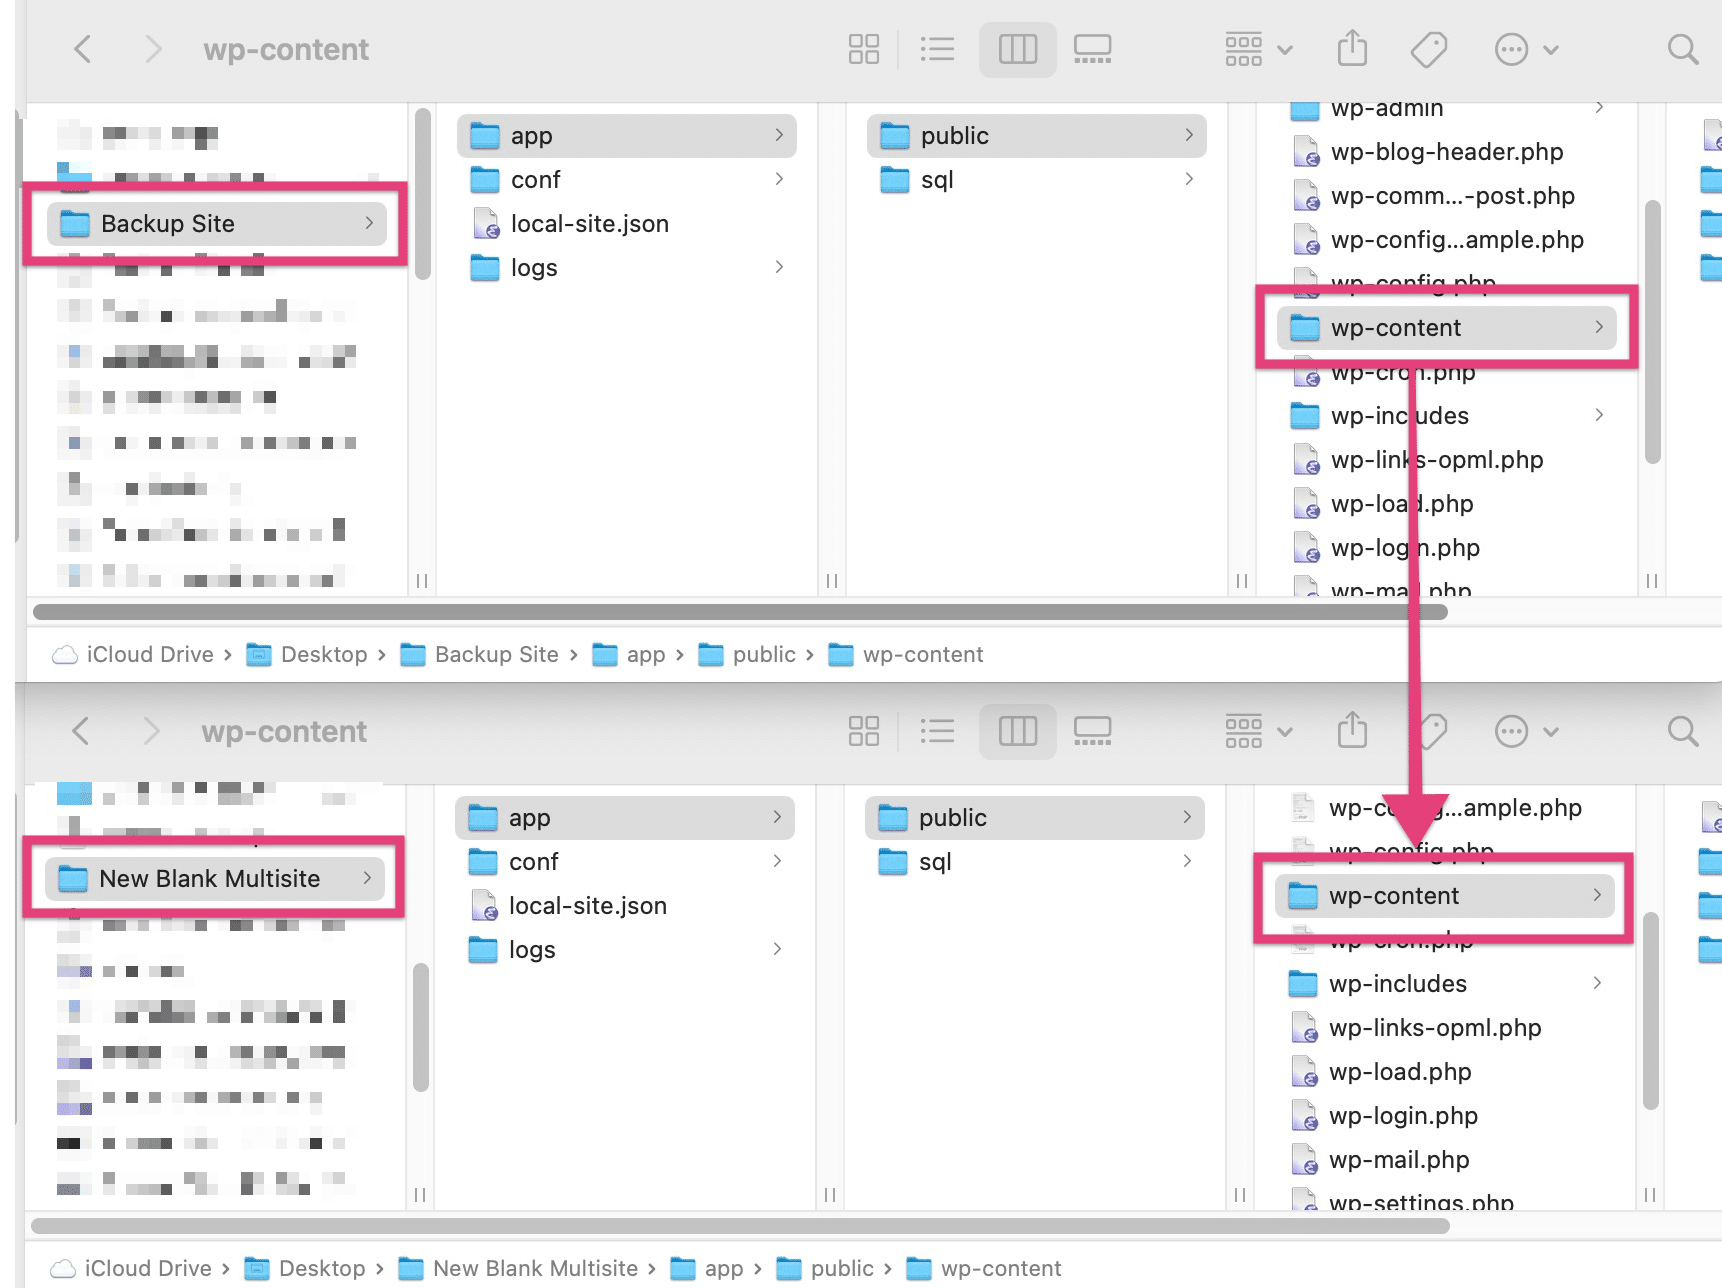
- The
wp-contentfolder that is created with the new blank site you can renamewp-content-oldor just delete it. Copy thewp-contentfolder from your backup to the newly created site’s location to take its place (screenshot below). - Copy the correct SQL file into the site root (
App > Public). If you’re working with a WPE backup, the SQL file can be found at/wp-content/mysql.sql - Within Local, click
Open Site Shell - Import your Database with
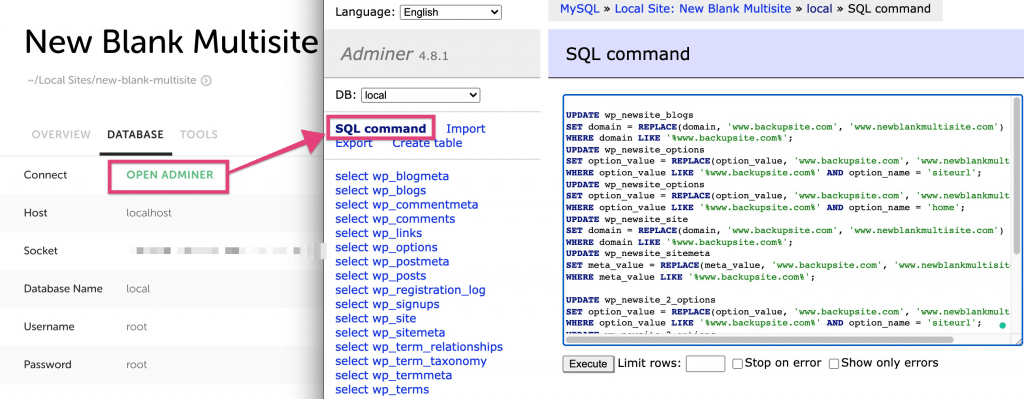
wp db import your-database-filename.sql - Because multisites have a more complicated configuration of their subsite URLs, you’ll need to run some specific SQL queries to update them. Use the examples in this forum post to generate those SQL commands manually. For simplicity, Flywheel has a WordPress Multisite Domain Replacement Tool you can use here.
- Using Adminer from the “Database” tab in Local, run the SQL commands from the previous step.
Deploy a Multisite from Local
Because Local Connect is not compatible with WordPress multisites, in order to deploy your changes, you’ll need to go through a more manual process.
Option 1:
Perform a manual migration to the remote environment using the steps below.
Option 2:
If using Flywheel, you can export your Multisite from Local, by right-clicking on the site and selecting Export.
From there, request a free migration to have our migration team create a site for you on Flywheel!
The process above is for deploying the entire multisite network and will not work for individual sub-sites.
Option 3:
As an alternative premium plugin, we recommend WP Migrate. They have several multisite deploy options that could be useful and have great documentation here.
As a note, the plan type required depends on the type of multisite migration.
If migrating the full multisite to another multisite, you will likely need a Plus Plan.
If migrating in to, out of, or between networks, then you will need the Multisite Tools which are only available in the Premier plan.
More details on their plans here.